What It's For
Layaways let customers pay for a product over time. You hold the item until they finish paying.
Where to Find It
Sidebar → Layaways
What You'll See
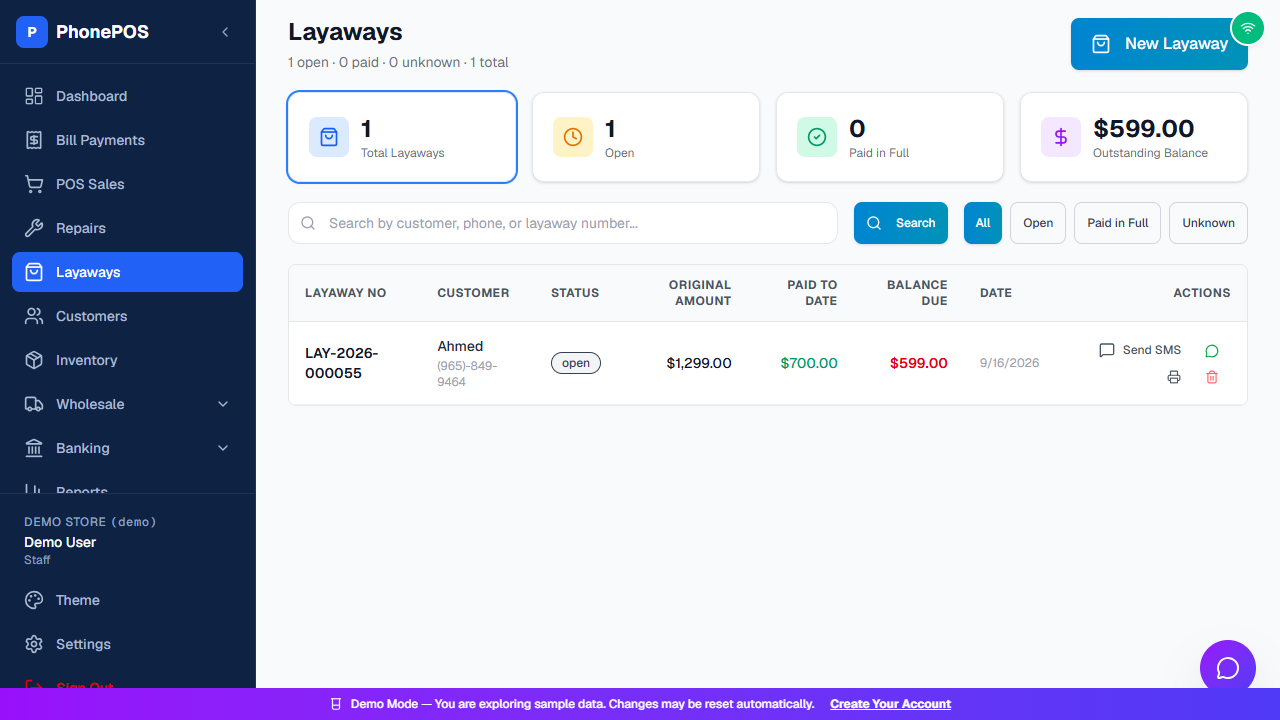
The header shows a summary such as "1 open · 0 paid · 0 unknown · 1 total", with cards for Total Layaways, Open, Paid in Full, and Outstanding Balance.
| Column | Meaning |
|---|---|
| Layaway No | Layaway number (e.g., LAY-2026-000055) |
| Customer | Customer name and phone |
| Status | Open, Paid in Full, etc. |
| Original Amount | Total price of the items |
| Paid to Date | Amount paid so far |
| Balance Due | Remaining balance |
| Date | Layaway date |
| Actions | Edit, send SMS, print, take a Payment, or cancel/delete (authorized roles) |
Use the All / Open / Paid in Full / Unknown filters together with the custom search.
How To: Search layaway history
Above Layaways, or in Dashboard → History → Layaways, choose Search by: All fields, Customer name, Phone number, Layaway number, Employee, or Item. Enter the value, optionally choose From/To dates, and click Search or press Enter. Both date endpoints are included and use the displayed layaway date.
Phone formatting is ignored. A new search resets pagination to page 1. Clear removes the text/date search. The Export CSV button in the History tab exports the matching layaways.
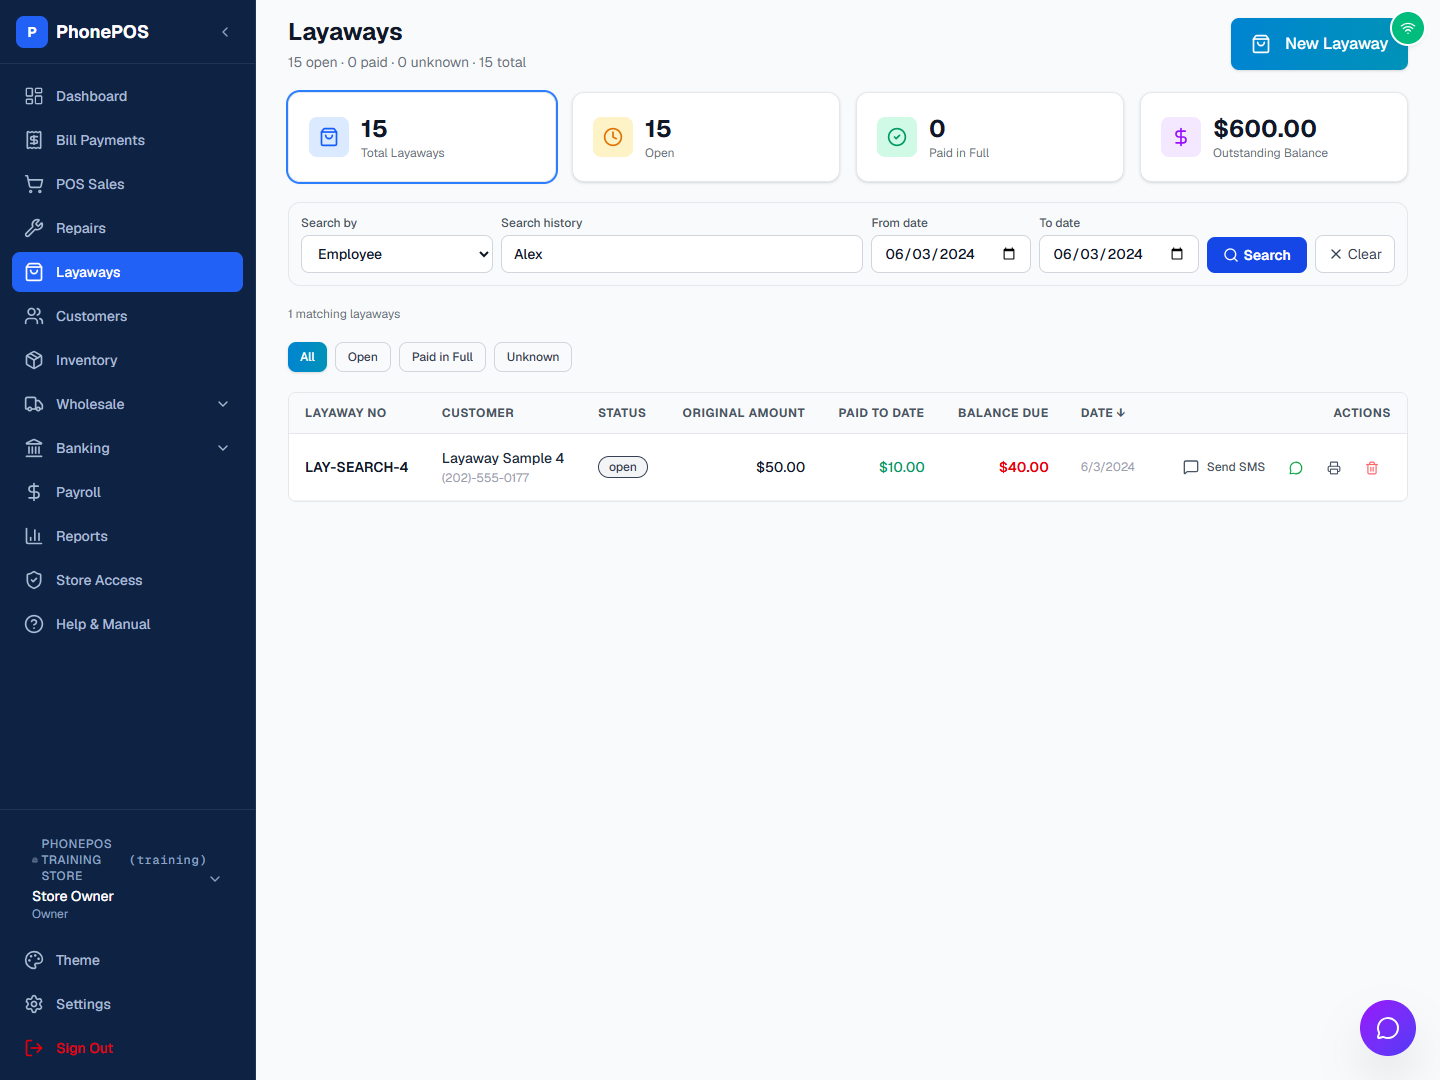
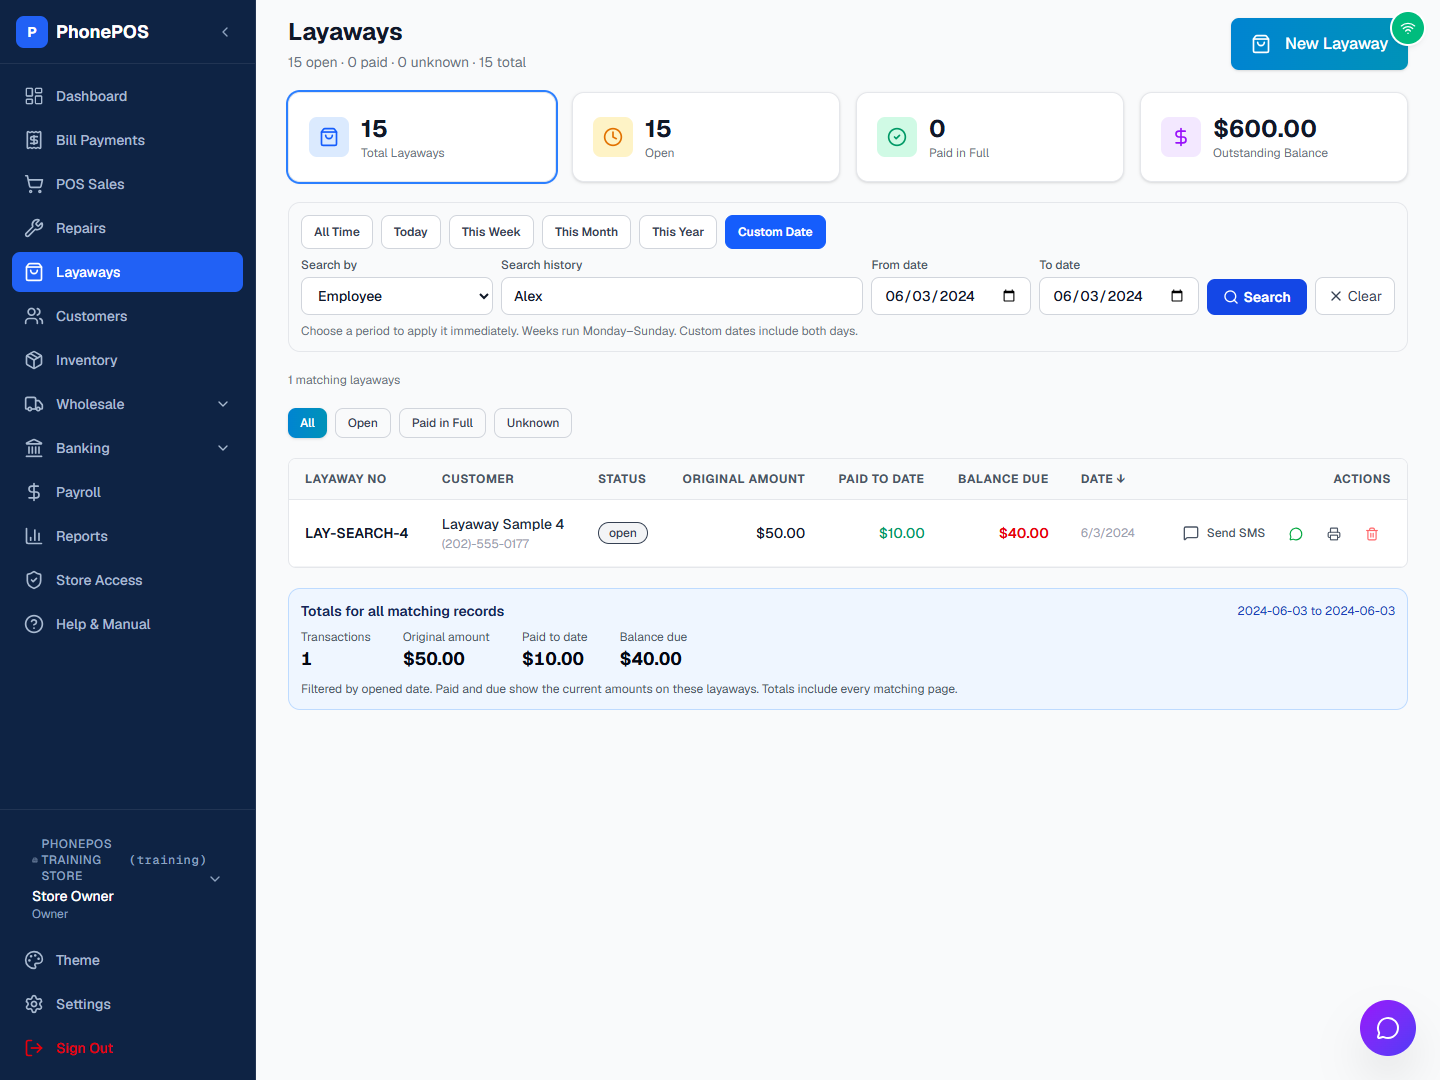
The period buttons apply Today, This Week, This Month, This Year, or All Time immediately. Custom Date applies when you click Search. Below the table, Totals for all matching records shows the transaction count, original amount, paid to date, and balance due across all matching pages. Status filters also affect these totals. Cancelled records and records with incomplete amounts are excluded from money totals with a notice.
Dates select the opened date. Paid and due are the current amounts on those layaways, not a report of installment payments collected during that period.
How To: Create a Layaway
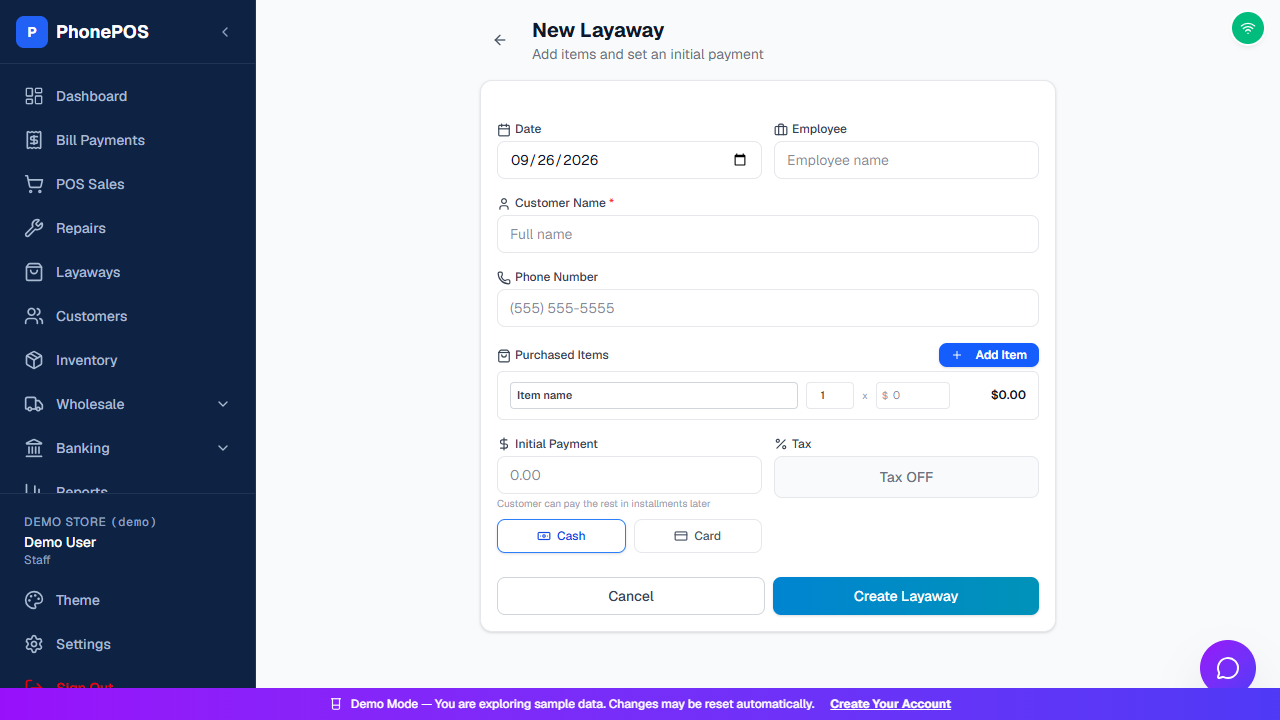
- Click "New Layaway"
- Fill in the form:
- Date and Employee
- Customer Name (required)
- Phone Number
- Purchased Items — click + Add Item and enter the item name, quantity, and price
- Initial Payment — the amount paid today
- Tax — toggle on/off
- Cash or Card — how the initial payment was made
- Click "Create Layaway"
How To: Edit a layaway and trace changes
- Click Edit beside the record in Layaways or Dashboard → History → Layaways.
- Correct the customer name, phone, item description, IMEI/serial, pickup date, or customer notes. Imported records without item lines have an item-description and IMEI/serial field.
- Enter a Reason for change and click Save changes. The app rereads the saved record before confirming success. The table, matching-record totals, and a reopened receipt use the updated values.
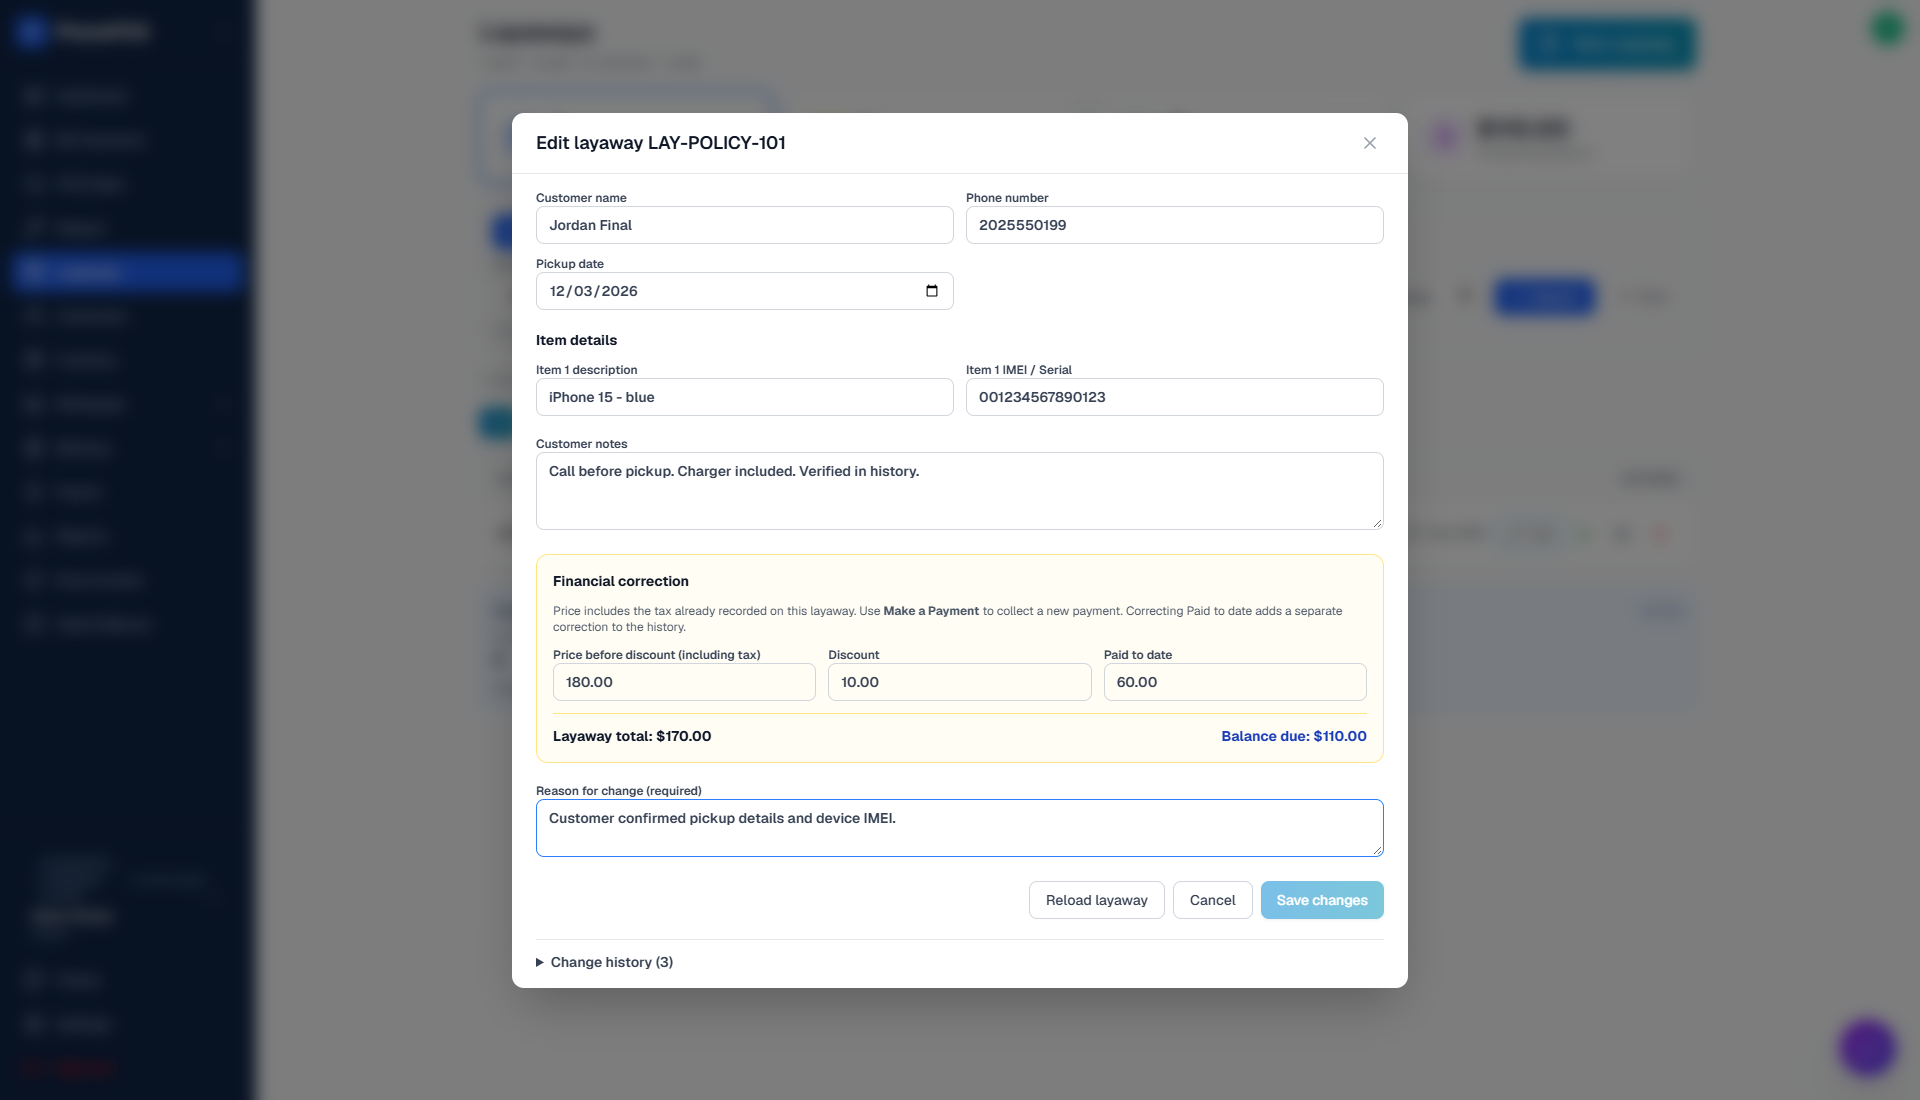
Only Owners, Admins, and Managers can correct financial amounts. Price before discount includes the tax already recorded on this layaway. Layaway total = Price − Discount and Balance due = Layaway total − Paid to date. Original item prices and recorded tax remain in the history; a printed Price adjustment explains any difference. This editor does not recalculate tax rates or replace item quantities.
Use Payment / Make a Payment for money collected now. Changing Paid to date corrects an earlier entry; it appends a signed Payment correction, preserves original payments, and does not itself collect or refund money. Financial changes are locked for canceled or closed records. Staff can still correct customer and item details.
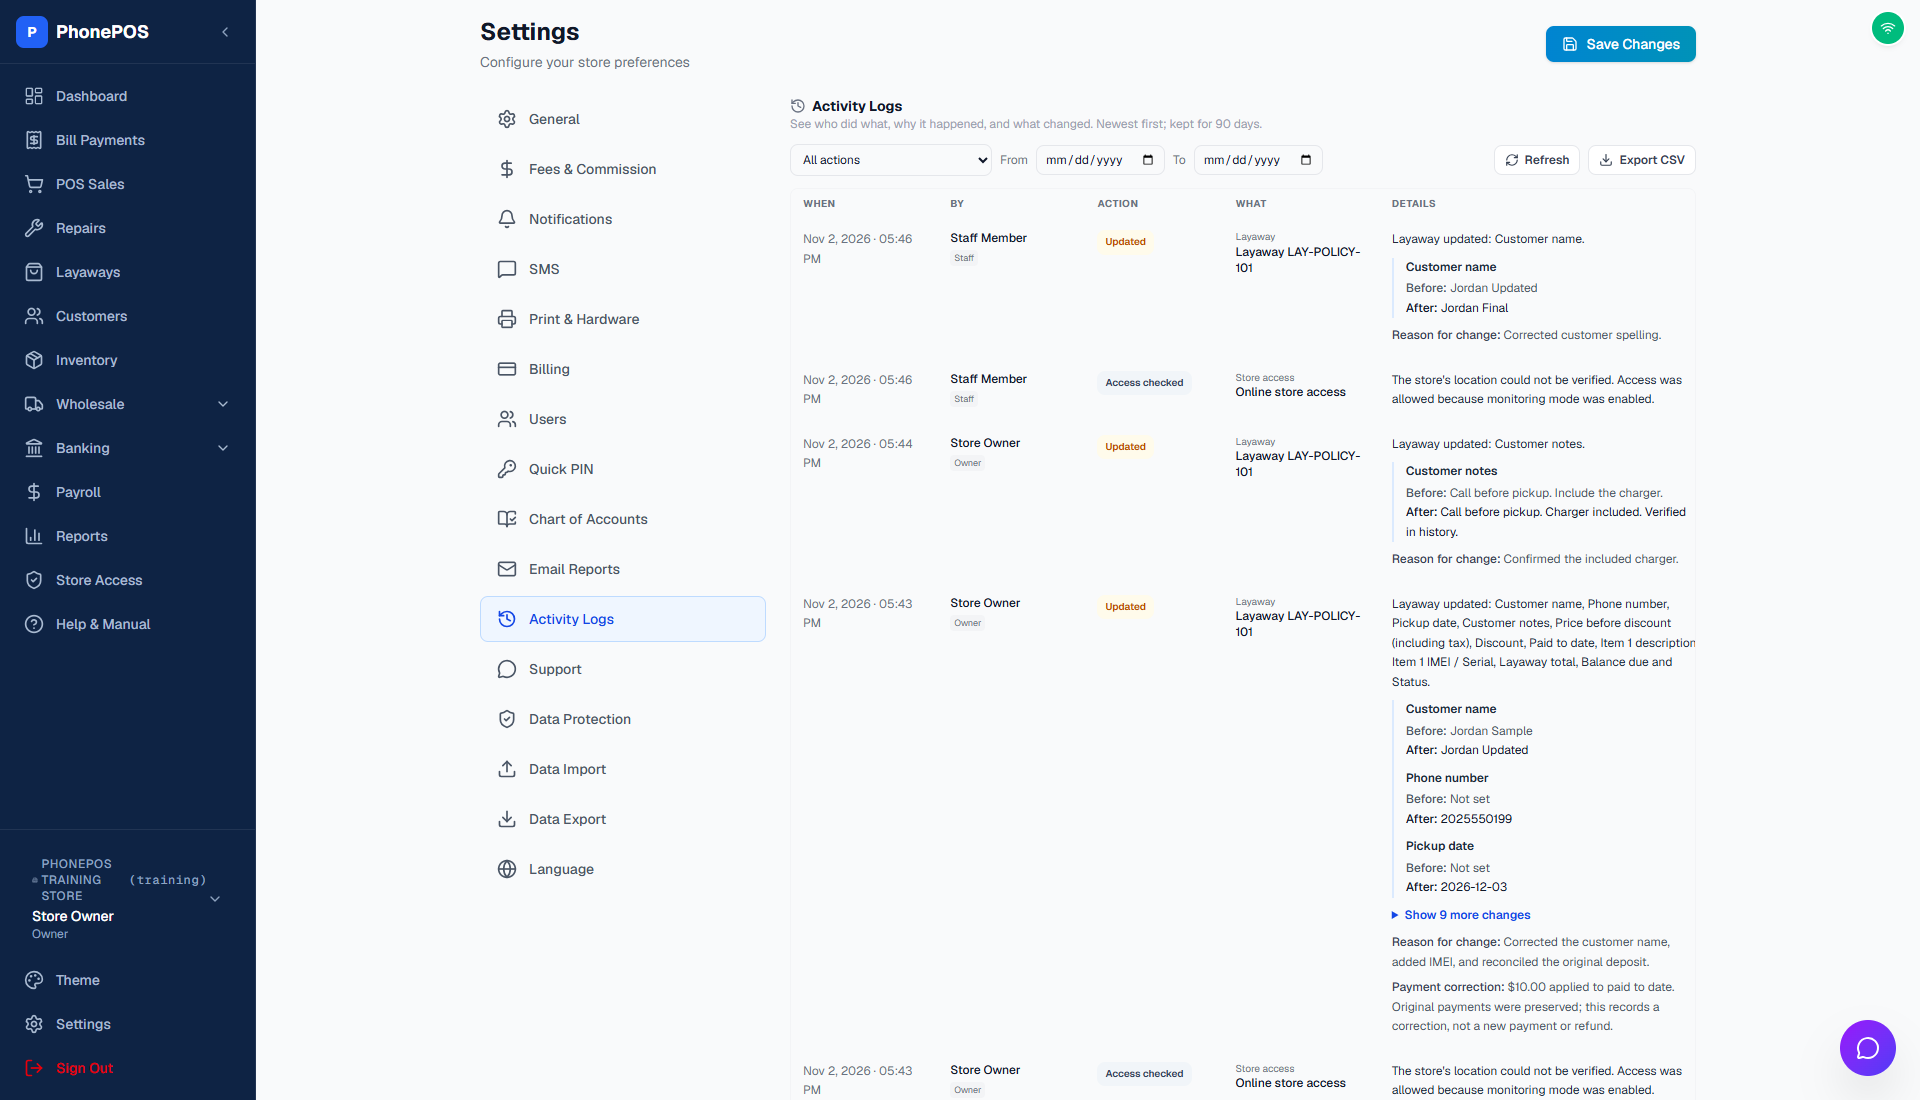
Open Change history in the editor to see who changed each field, when, the reason, and the exact Before → After values. Managers, Admins, and Owners also see these entries in Settings → Activity Logs. Each edit and its audit entry save together. Per-record history remains attached to the layaway even after an Activity Log entry reaches the 90-day retention limit.
If another employee edits or takes a payment while the editor is open, the app asks you to Reload layaway instead of overwriting newer information. Review the latest values before applying your correction again.
How To: Take a Layaway Payment
- Find the layaway in the list
- Click "Payment" in the Actions column
- Enter the payment amount
- Confirm the payment
What Happens After
- The balance decreases
- When balance reaches $0, status changes to "Paid in Full"
- You can release the item to the customer
Common Mistakes
| Mistake | How to Fix |
|---|---|
| Customer wants to cancel | An Owner, Admin, or Manager can cancel it. Records with payments or edits are retained. Any actual refund must be handled separately. |
| Wrong amount entered | An authorized manager uses Edit, records the correction and reason, and reviews the new balance. |