Where to Find It
Sidebar → Settings
Settings Tabs
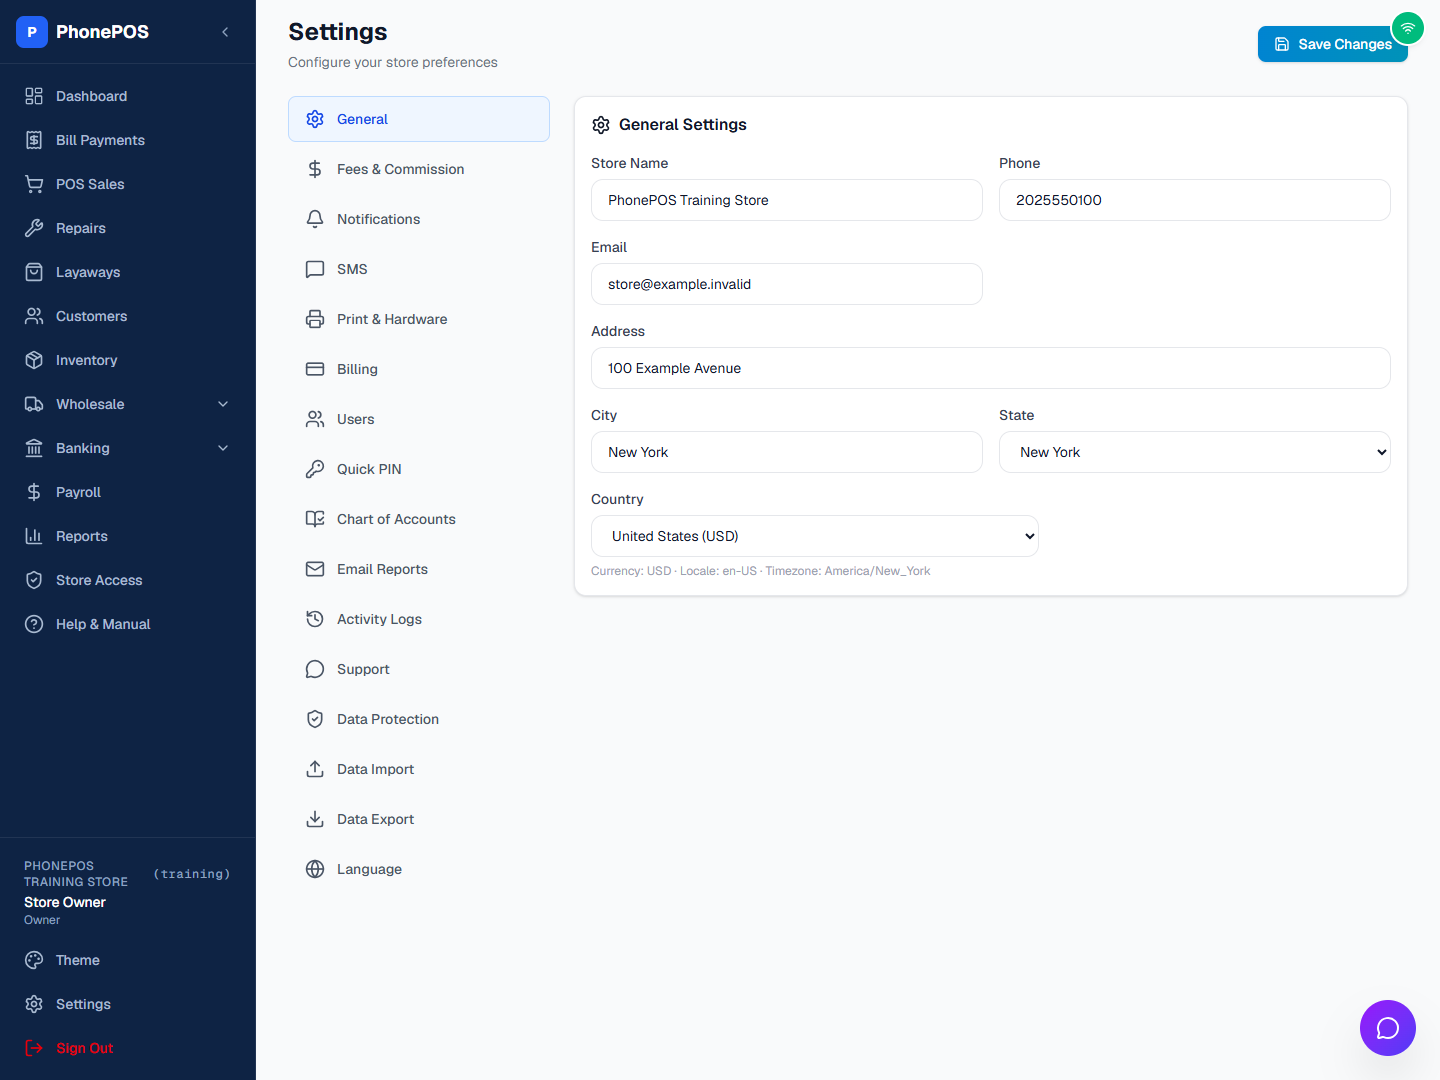
| Tab | What It Does |
|---|---|
| General | Store name, phone, email, address, city, state, Country (sets currency/locale/timezone) |
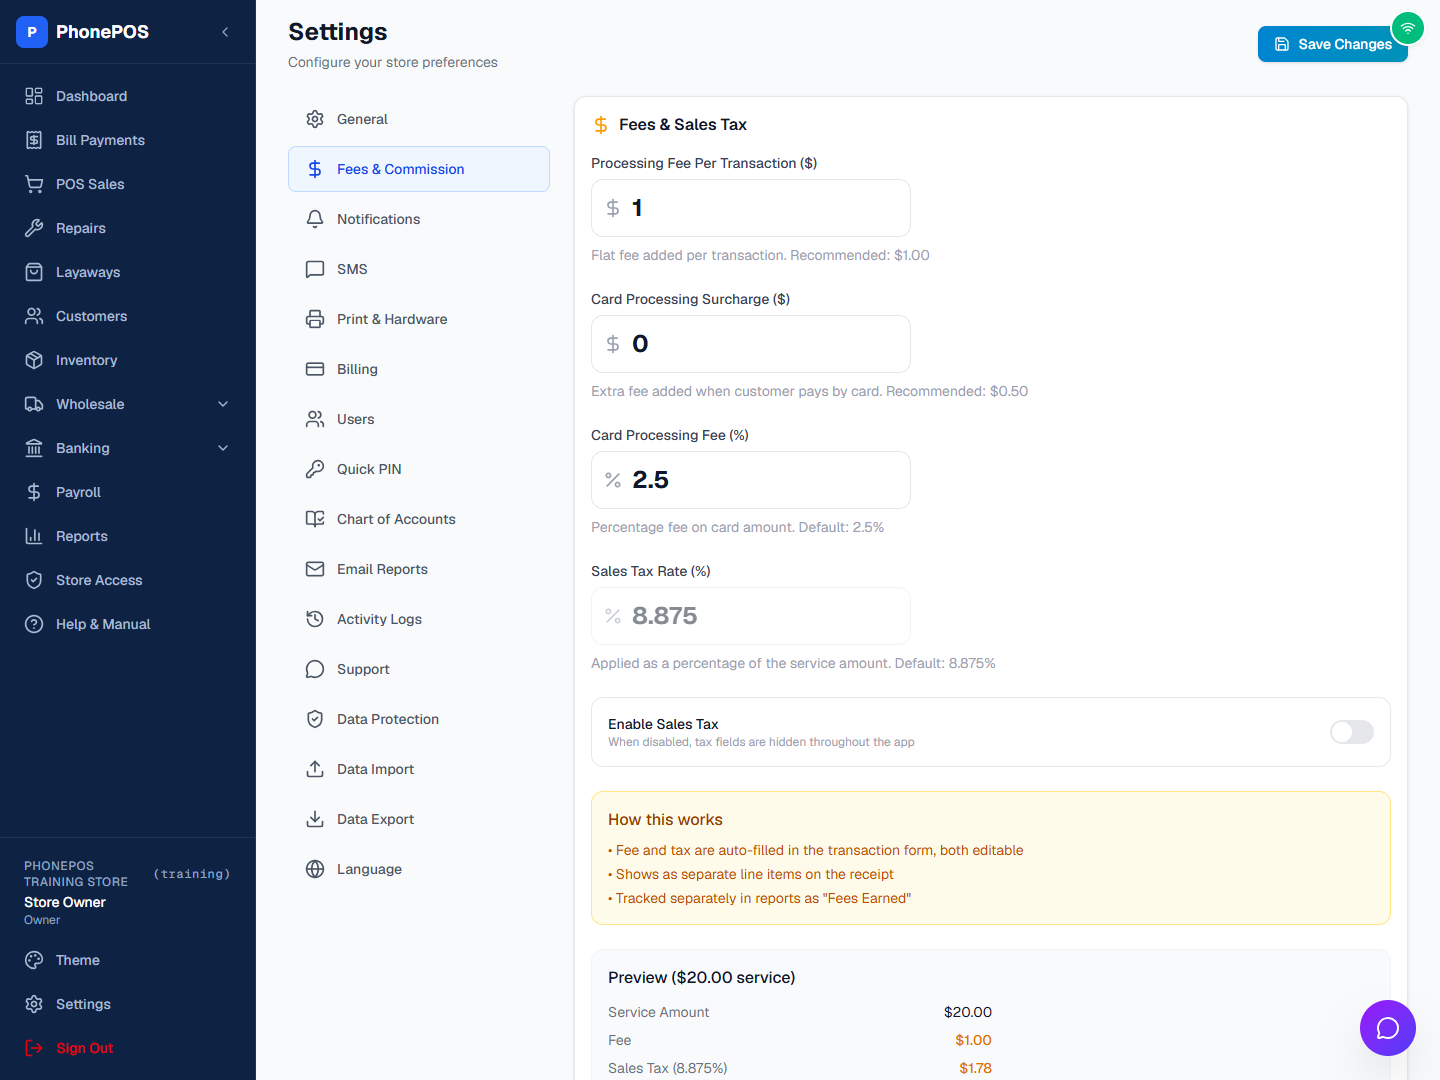
| Fees & Commission | Processing fees, tax, Carriers, and Custom Carrier Fees |
| Notifications | Email/SMS settings |
| SMS | Managed SMS service status, reminder settings, templates, and message log |
| Print & Hardware | Printer & cash drawer, repair label (phone sticker), repair receipt printing, invoice configuration |
| Billing | Subscription plan, payment method, invoices, SMS reminders add-on |
| Users | Employee accounts |
| Quick PIN | Enable / change / disable Quick PIN and manage trusted devices |
| Chart of Accounts | Accounting categories |
| Email Reports | Automated email reports |
| Activity Logs | Who changed what (visible to Manager, Admin, or Owner only) |
| Support | Submit and track support tickets |
| Data Import | Import legacy data (e.g., CellSmart) |
| Data Export | Owner/Admin downloads of store datasets or a complete ZIP |
| Data Protection | Backup protection information and status |
| Language | Change the interface language |
Users & Permissions
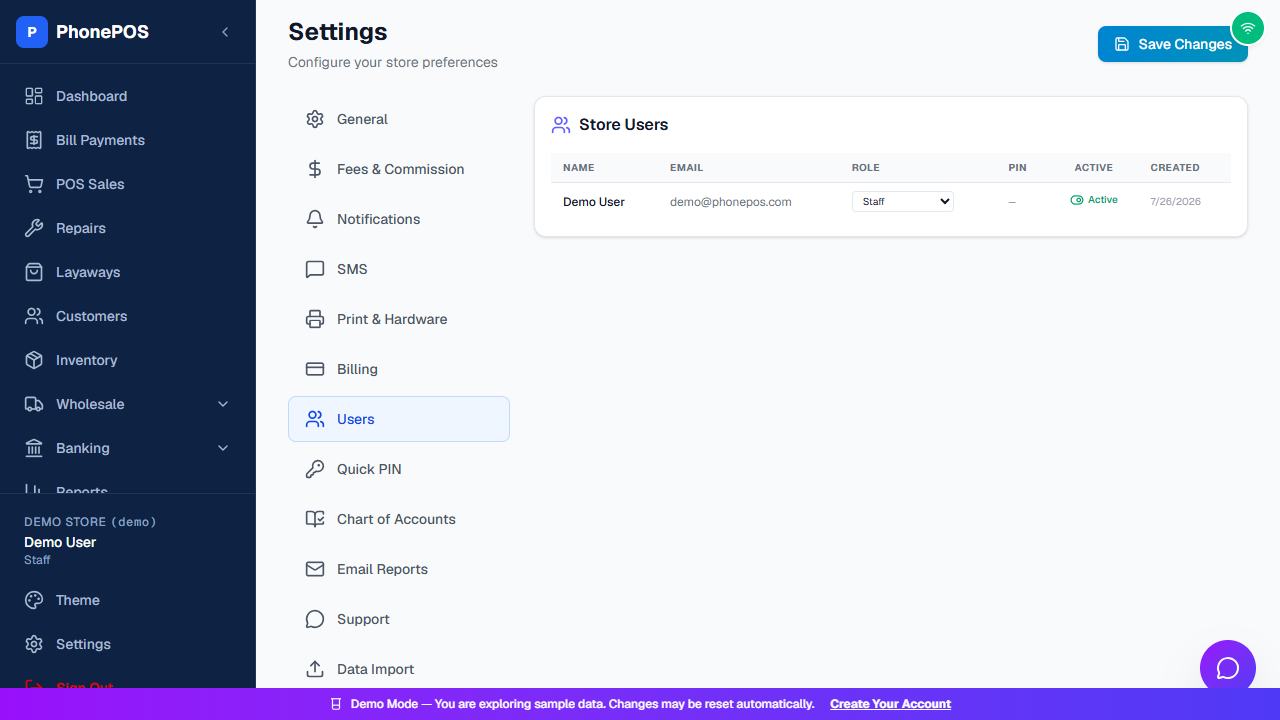
To add an employee:
- Go to Settings → Users
- Click "Add User"
- Enter:
- Name: Employee name
- Email: Their login email
- Password: Temporary password
- Role: Staff, Manager, or Admin
- Click "Create User"
To change a user's role:
- Find the user in the list
- Click "Edit"
- Change the Role dropdown
- Click "Save"
To deactivate a user:
- Find the user
- Click the Power button (toggle off)
- They can no longer log in
Admin role scope: Admin manages the authorized store only; this role does not provide access to SaaS administration.
Quick PIN
Settings → Quick PIN manages fast sign-in on this device.
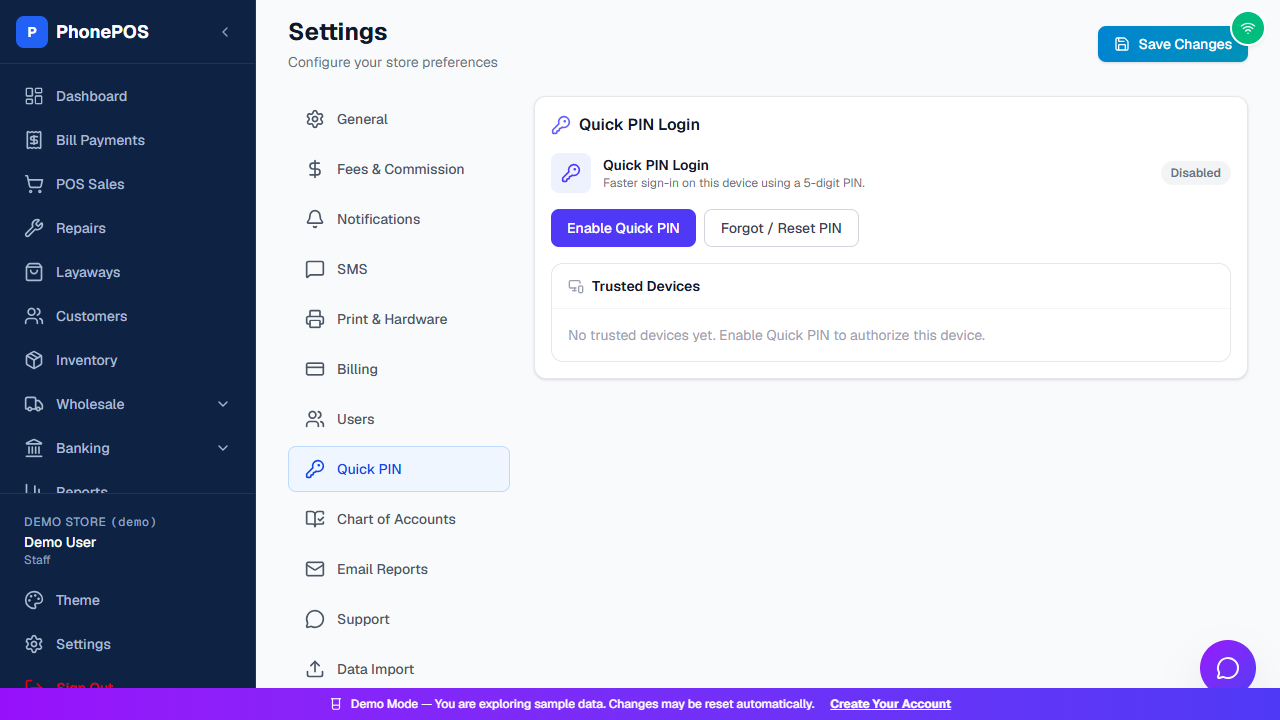
- Enable Quick PIN — set a 5-digit PIN and authorize the current device
- Change PIN — replace the PIN (the old PIN is invalidated)
- Disable Quick PIN — turns it off and revokes all trusted devices
- Forgot / Reset PIN — start the secure reset flow
- Trusted Devices — see the devices authorized for your account and revoke any of them
What is PIN Login?
Once you enable Quick PIN on a device, PhonePOS remembers that device. The next time you open the app on it, instead of the normal email/password form you'll see a full-screen PIN sign-in screen:
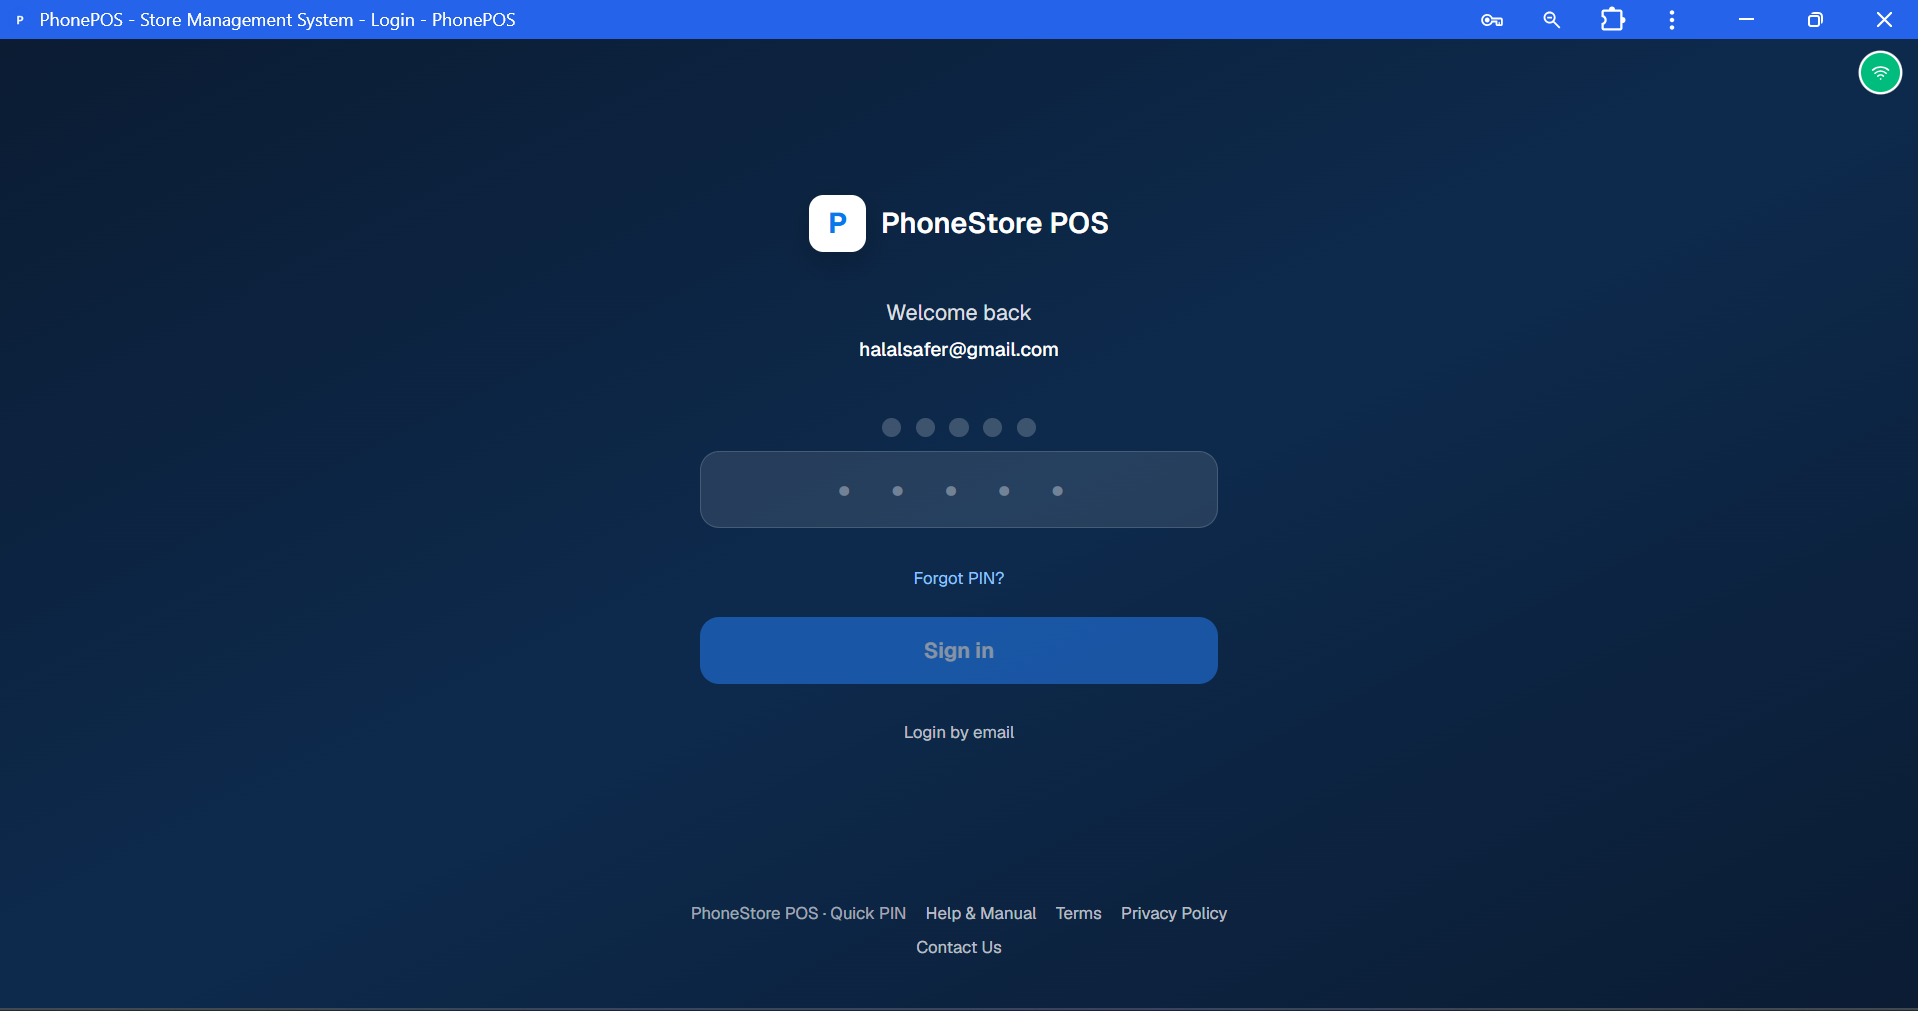
The screen shows:
- PhoneStore POS branding
- Welcome back and the email of the account the device is authorized for — this is display only and cannot be edited here
- A large 5-digit PIN field with five progress dots above it
- Forgot PIN? directly under the PIN field
- A Sign in button (enabled once all five digits are entered)
- Login by email to switch to the normal email/password (and Google) login
How to sign in with Quick PIN:
- Open PhonePOS on the authorized device.
- Type your 5-digit PIN (the field is focused automatically on desktop, so you can type right away).
- Press Enter or click Sign in.
- You'll land on your dashboard, signed in to the same store, company, and role as a normal login.
Good to know:
- PIN login is tied to the specific device/browser where you enabled it. A new device, a reinstall, or cleared browser data means you must sign in with your password and enable Quick PIN again.
- Login by email always stays available on the PIN screen as a fallback (email, password, and Google sign-in).
- If you forget your PIN, use Forgot PIN? to receive a reset link by email. Resetting a Quick PIN never changes your password.
- Platform administrators (SaaS Super Admin and Country Managers) are excluded from Quick PIN.
Carriers and Custom Carrier Fees
Where to find them: Settings → Fees & Commission, below the fee, tax, and preview sections. Carriers are no longer in General. The gear icon next to Carrier in New Payment opens this tab at the carrier section.
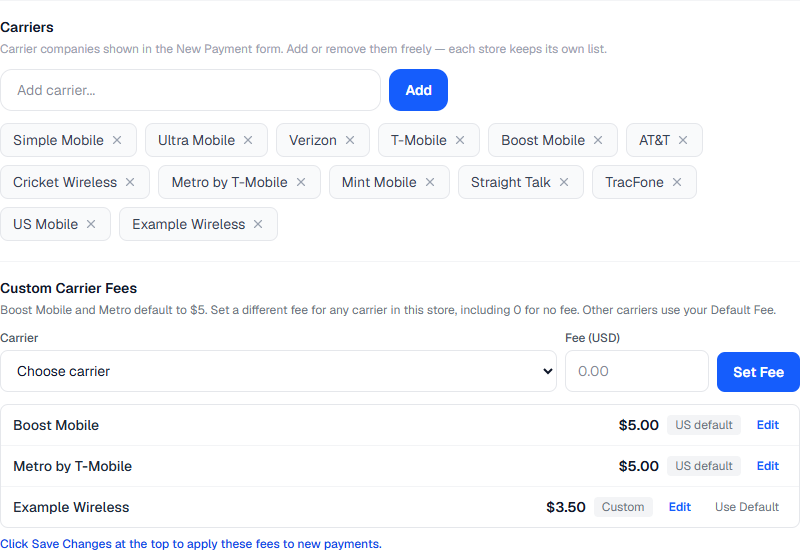
- Add: Type a carrier in Add carrier..., then press Enter or click Add.
- Remove: Click the X on its chip.
- Set a fee: Choose a carrier under Custom Carrier Fees, enter the amount, and click Set Fee.
- Apply: Click Save Changes at the top of Settings. Wait for Settings saved! before leaving.
Boost Mobile and Metro default to $5 for US stores. A custom fee, including zero, overrides that default. Other carriers use the processing fee unless overridden. Click Use Default, then Save Changes, to remove a custom override. Each store keeps its own list and fees.
If all carriers are removed and saved, New Payment falls back to the country default list. Removing a carrier from the list does not delete historical payments. Owners, Store Admins, and Store Managers can save these settings. See Chapter 3: Bill Payments for the full walkthrough.
Invoice Configuration
Invoice configuration is found inside the Print & Hardware tab. It has three sub-sections:
- Sales Persons — Add the sales people who should appear in the "Sales Person" dropdown when creating a wholesale invoice. Stored per store.
- Template — Choose which elements appear on the invoice:
- Header: Your logo and store info
- Items Table: What columns to show
- Totals Summary: Subtotal, tax, total
- Payments: Payment methods list
- Terms & Notes: Default terms text
- Signature: Whether to include a signature line
- Print Theme — Choose the layout and color theme used when printing the invoice (Classic, Modern, Minimal, Corporate, Dark, or Thermal).
Print & Hardware / Printer Setup
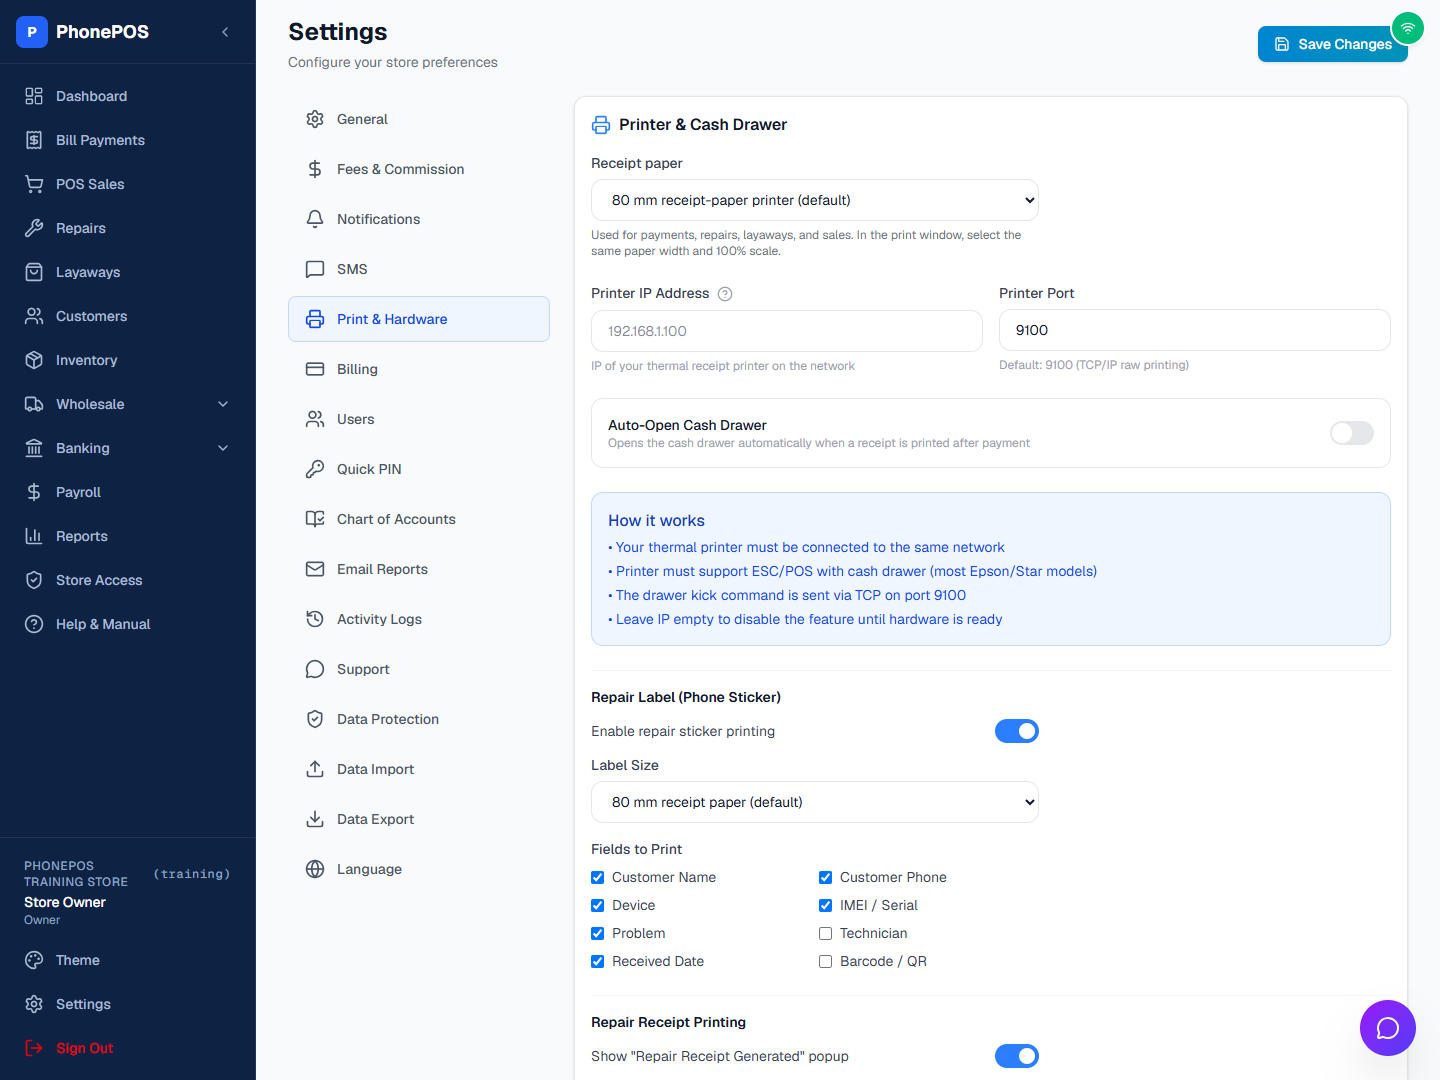
The Print & Hardware tab combines printer setup, cash drawer, repair labels, receipt printing, and invoice configuration.
- Choose Receipt paper. 80 mm receipt-paper printer (default) applies to payments, repairs, layaways, and sales. Use 58 mm only when that matches your printer's roll.
- For a network printer, enter its IP address and Port (normally
9100) and use the printer test. USB/Windows printers use their installed driver or the configured Print Agent. - Enable Auto-Open Cash Drawer only if the printer/drawer setup supports it.
- Click Save Changes. In the print dialog, select the same paper width and 100% scale; turn off browser headers and footers.
Repair Label (Phone Sticker): Enable sticker printing, choose the label size that matches the actual media, and select fields such as customer, device, IMEI/serial, issue, and technician. Save Changes before printing.
Repair Receipt Printing: The Repair Receipt Generated popup offers separate Print Customer Receipt, Print Phone Sticker, and Print Store Receipt actions. With the popup disabled, the customer receipt opens directly. Each customer/store action prints one copy. Optional separate receipt and sticker printer IP/port settings can be used for different devices.
Print Agent: If configured for your store, pair the Windows agent with the store and select its printer before enabling automatic receipt printing. Keep the agent running on the printing computer. Browser printing remains available; do not expect an IP address setting to connect directly to a USB-only printer.
Receipt Policy Templates
Open Settings → Print & Hardware → Printer & Cash Drawer, then scroll to Receipt Policy Templates.
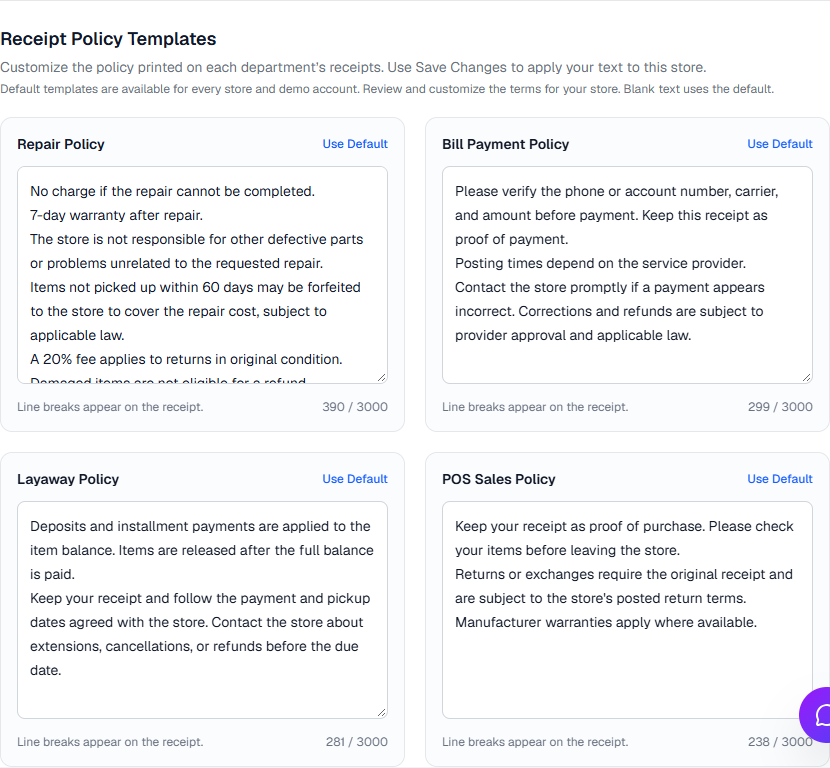
Each department has its own policy:
| Template | Where it appears |
|---|---|
| Repair Policy | Repair ticket customer/store copies and individual repair payment receipts |
| Bill Payment Policy | New bill payment receipts and imported payment reprints |
| Layaway Policy | Layaway receipts |
| POS Sales Policy | Retail sales receipts |
- Edit the text in the appropriate box. You can use multiple lines, up to 3,000 characters per policy.
- Click Save Changes at the top of Settings. Wait for Settings saved! before leaving the page.
- Open or reopen a receipt to see the saved text. Reprints use the current policy for that department.
- To restore a template, click its Use Default button and then Save Changes. Saving a blank box also restores the default.
Policies are saved separately for each store. An owner, admin, or manager can edit them; saving one store's policies does not change another store. Existing, new, and demo stores receive the default templates when no custom text has been saved. The repair default includes no charge when a repair cannot be completed, a 7-day warranty, unrelated-defect terms, a 60-day collection term, and the return terms. Review the text and customize it for your store; sample store license numbers are not included.
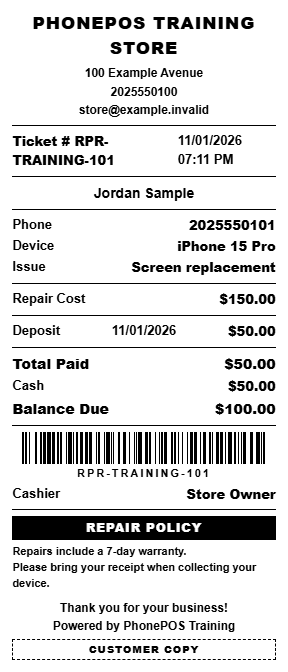
The receipt keeps your selected 80 mm or 58 mm paper width. Line breaks are preserved; longer policies naturally use more paper. For Windows Print Agent automatic sales printing, use an agent build that supports the policy fields; browser printing always uses the current receipt template.
Billing & Subscription
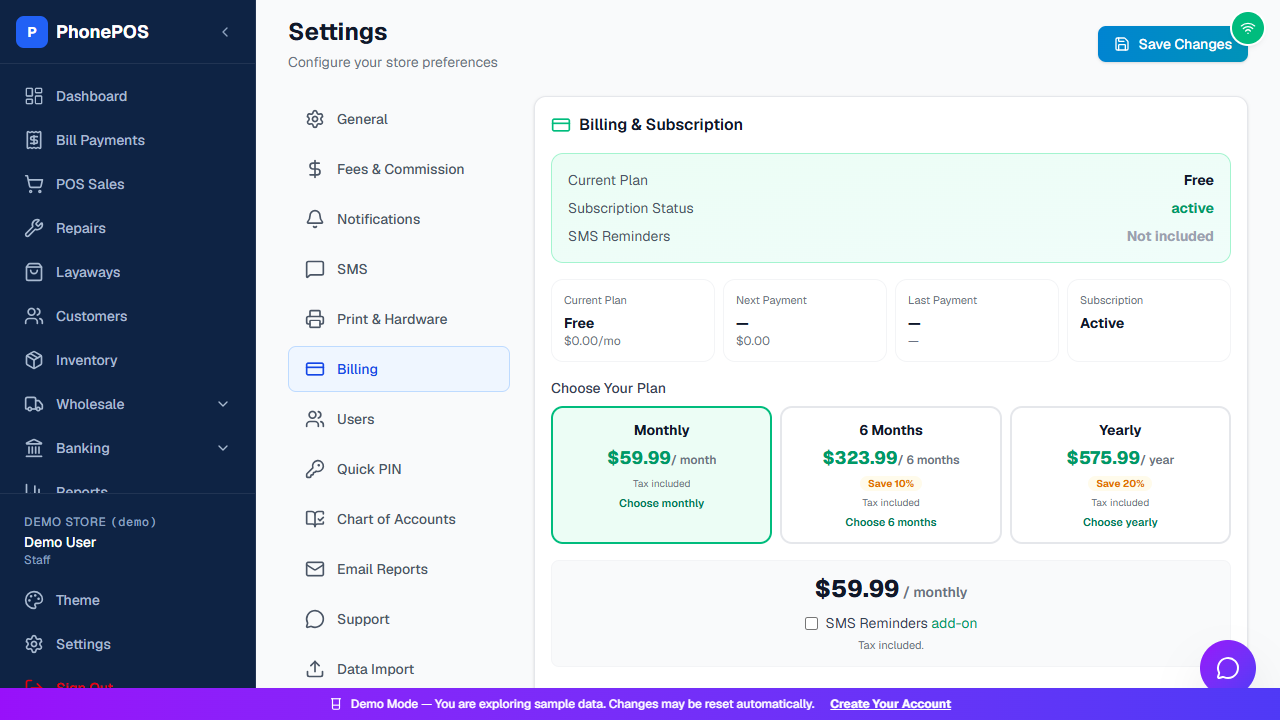
The Billing tab is where you manage your PhonePOS subscription. It shows your current plan, status, price, next billing date, and your payment history.
What You'll See
| Card | What It Shows |
|---|---|
| Current Plan | Your active plan (Free, Monthly, 6 Months, or Yearly) |
| Subscription Status | Active, or the status of your subscription |
| Price | What you pay per billing interval |
| Next Billing Date | When your card will be charged next |
| SMS Reminders | Whether the SMS Reminders add-on is included |
| Last Payment | Your most recent payment and its status |
How To: Subscribe (Choose a Plan)
- Go to Settings → Billing
- Under "Choose Your Plan", click your desired plan:
- Monthly — $59.99 / month
- 6 Months — $323.99 / 6 months (Save 10%)
- Yearly — $575.99 / year (Save 20%)
- (Optional) Tick the SMS Reminders checkbox to add automated customer SMS reminders.
- A secure Stripe checkout form appears — enter your card details.
- Click "Pay".
- You'll see "✓ Subscription activated" once the payment is confirmed.
Tip: All plans include tax. You can change plans or upgrade at any time from the same screen.
How To: Change Your Plan
- Go to Settings → Billing
- Under "Change Your Plan", click the new plan you want.
- Complete the secure checkout with your card.
- The new plan is applied immediately and your next billing date updates.
How To: Manage Payment Method or Cancel (Existing Subscribers)
- Go to Settings → Billing
- Click "Manage billing in Stripe portal".
- In the Stripe Customer Portal you can:
- Update or change your card / payment method
- View invoices and payment history
- Cancel or reschedule your subscription
- Add or remove the SMS Reminders add-on
Note: The Stripe portal opens in a new tab. Your card details are never shown inside PhonePOS — billing is handled securely by Stripe.
How To: Add or Remove SMS Reminders on Your Plan
- Go to Settings → Billing
- On an active paid plan, click the "Add SMS Reminders" button (or "Remove SMS Reminders" to disable).
- The change is applied to your subscription.
SMS Messaging
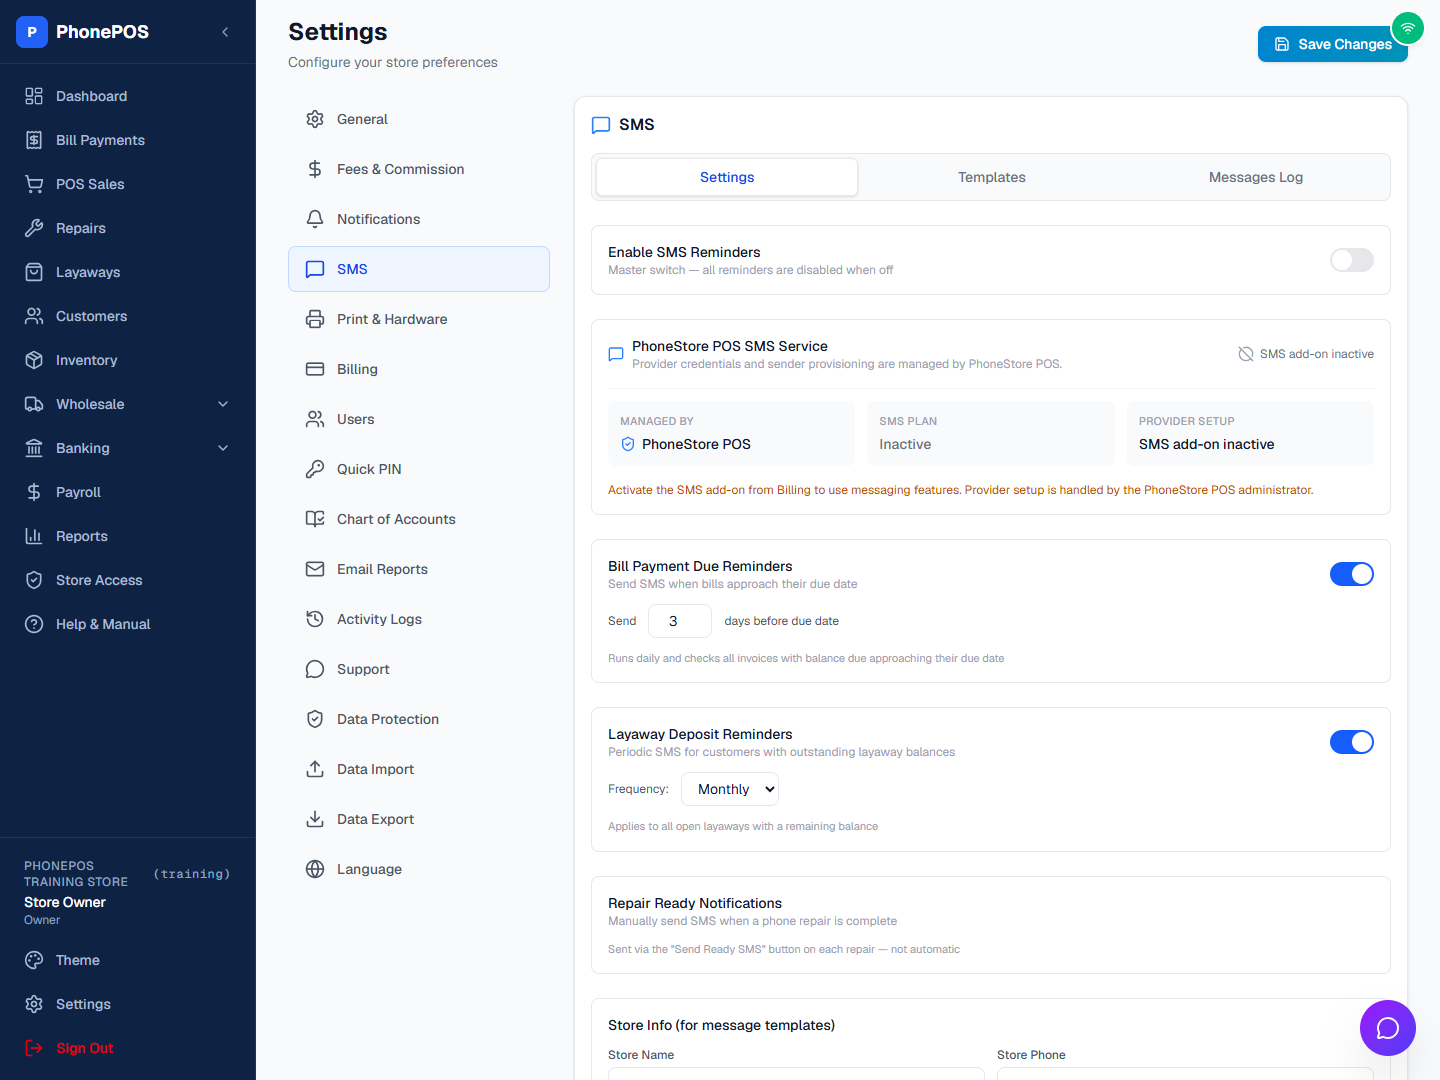
SMS provider credentials and sender provisioning are managed by PhoneStore POS. Store users do not enter Twilio credentials in Settings.
- Activate the SMS add-on under Settings → Billing.
- Open Settings → SMS → Settings. Check both SMS Plan and Provider Setup. An active plan alone does not mean the sender is ready; pending or unavailable service needs platform setup.
- Turn on Enable SMS Reminders and the reminder types you need. Save the SMS settings using the section's Save Settings button.
- Review wording in Templates, using the placeholders listed in the editor. Do not type a customer's actual details into a template intended for everyone.
- For repairs, obtain and record customer consent where the form offers it. Use the ticket's SMS / Send Ready SMS action when the repair is ready. The repair-ready action is manual, not an automatic message on every edit.
The consent checkbox is shown only when the store's SMS service is active and enabled. A phone number by itself is not consent. Do not promise delivery until the message log confirms it.
Messages Log: Review the recipient, message type, time, and status. Accepted or Queued means the provider has received the request; it does not prove delivery to the customer's phone. Check the final delivery state and any error details before retrying. Inactive plans or incomplete provider setup must be resolved first.
Chart of Accounts
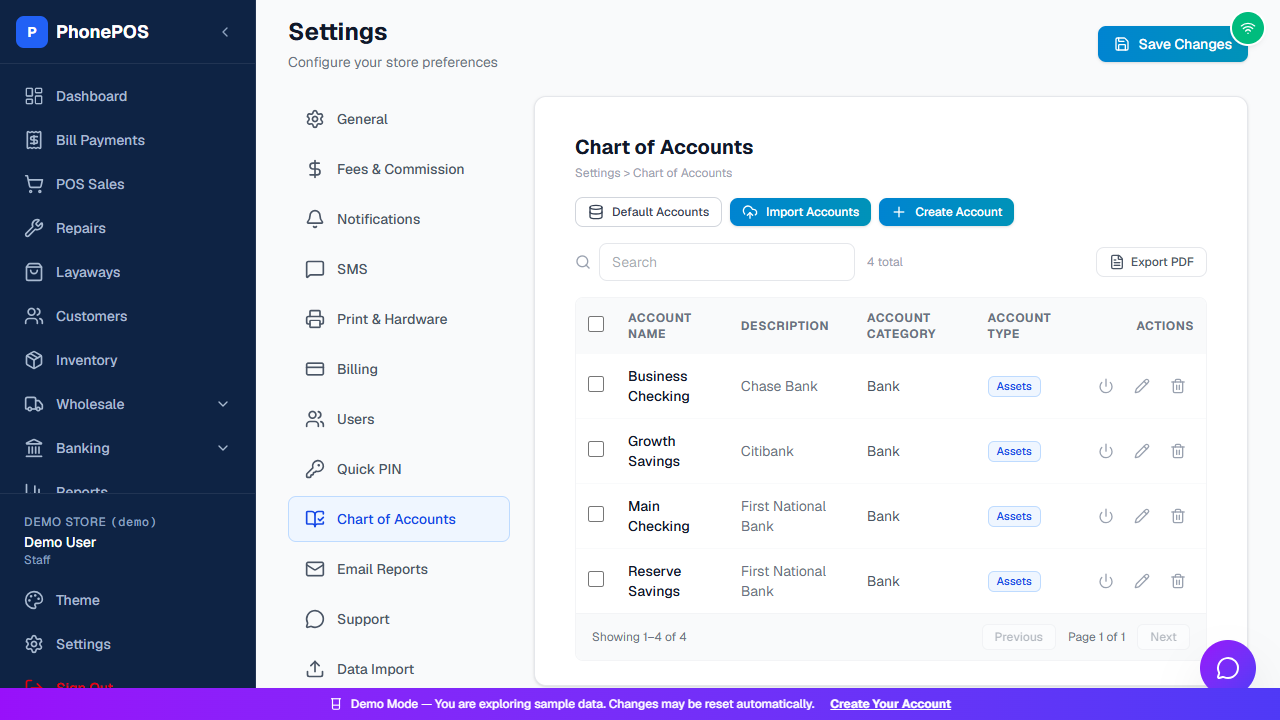
Settings → Chart of Accounts holds the accounting categories used by Banking and Reports.
Email Reports
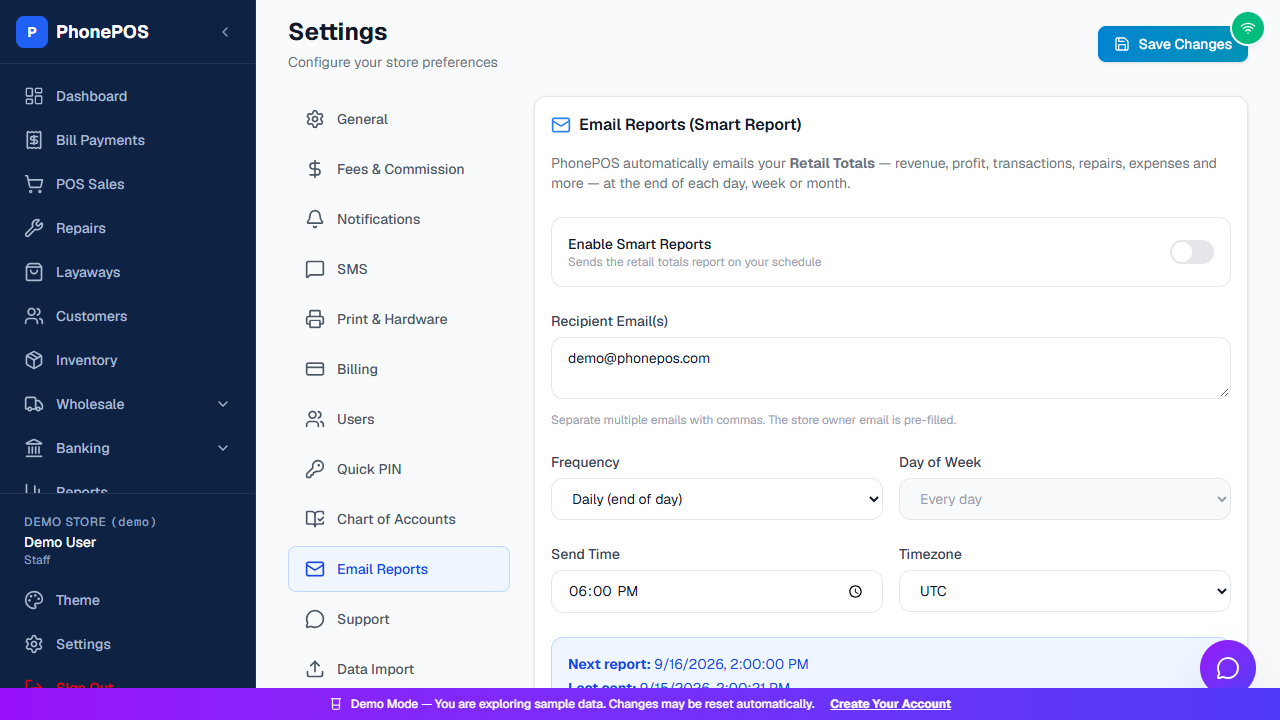
Settings → Email Reports configures automated reports emailed to you on a schedule.
Support
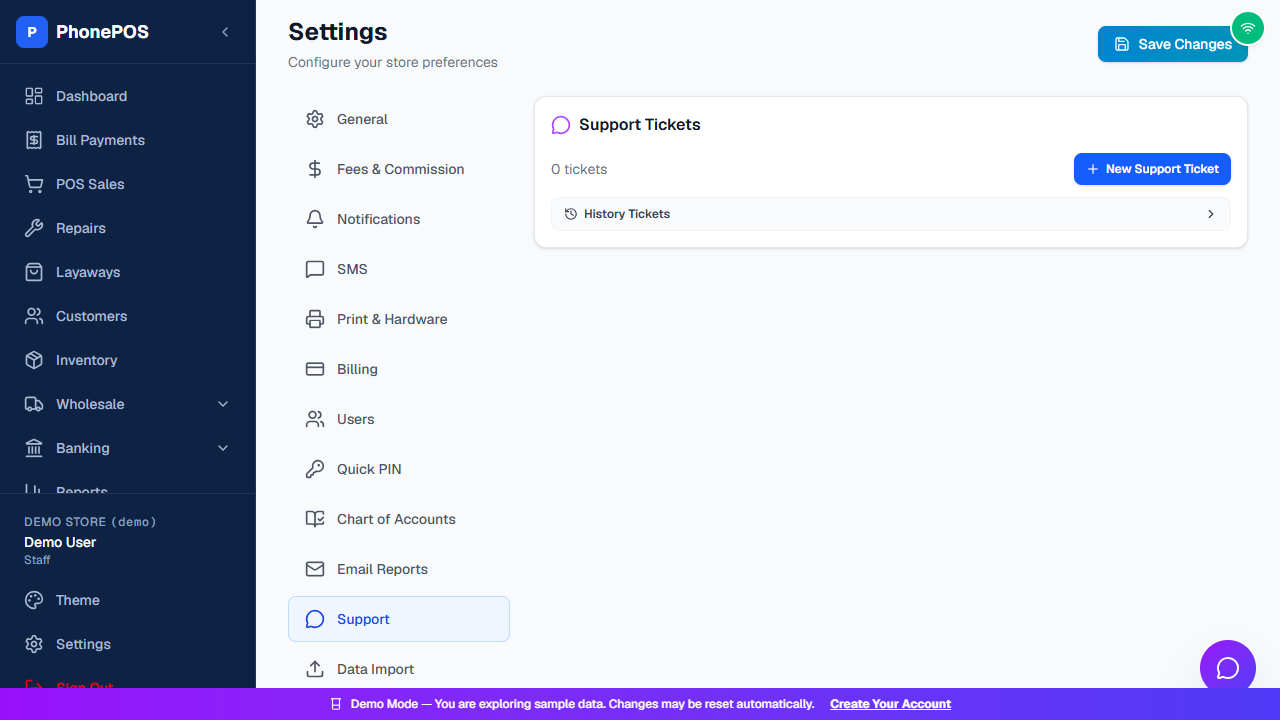
Settings → Support lets you submit and track support tickets to our team.