What It's For
Repairs tracks customer repair tickets from drop-off to pickup, including costs, status, and receipts.
Where to Find It
Sidebar → Repairs
What You'll See
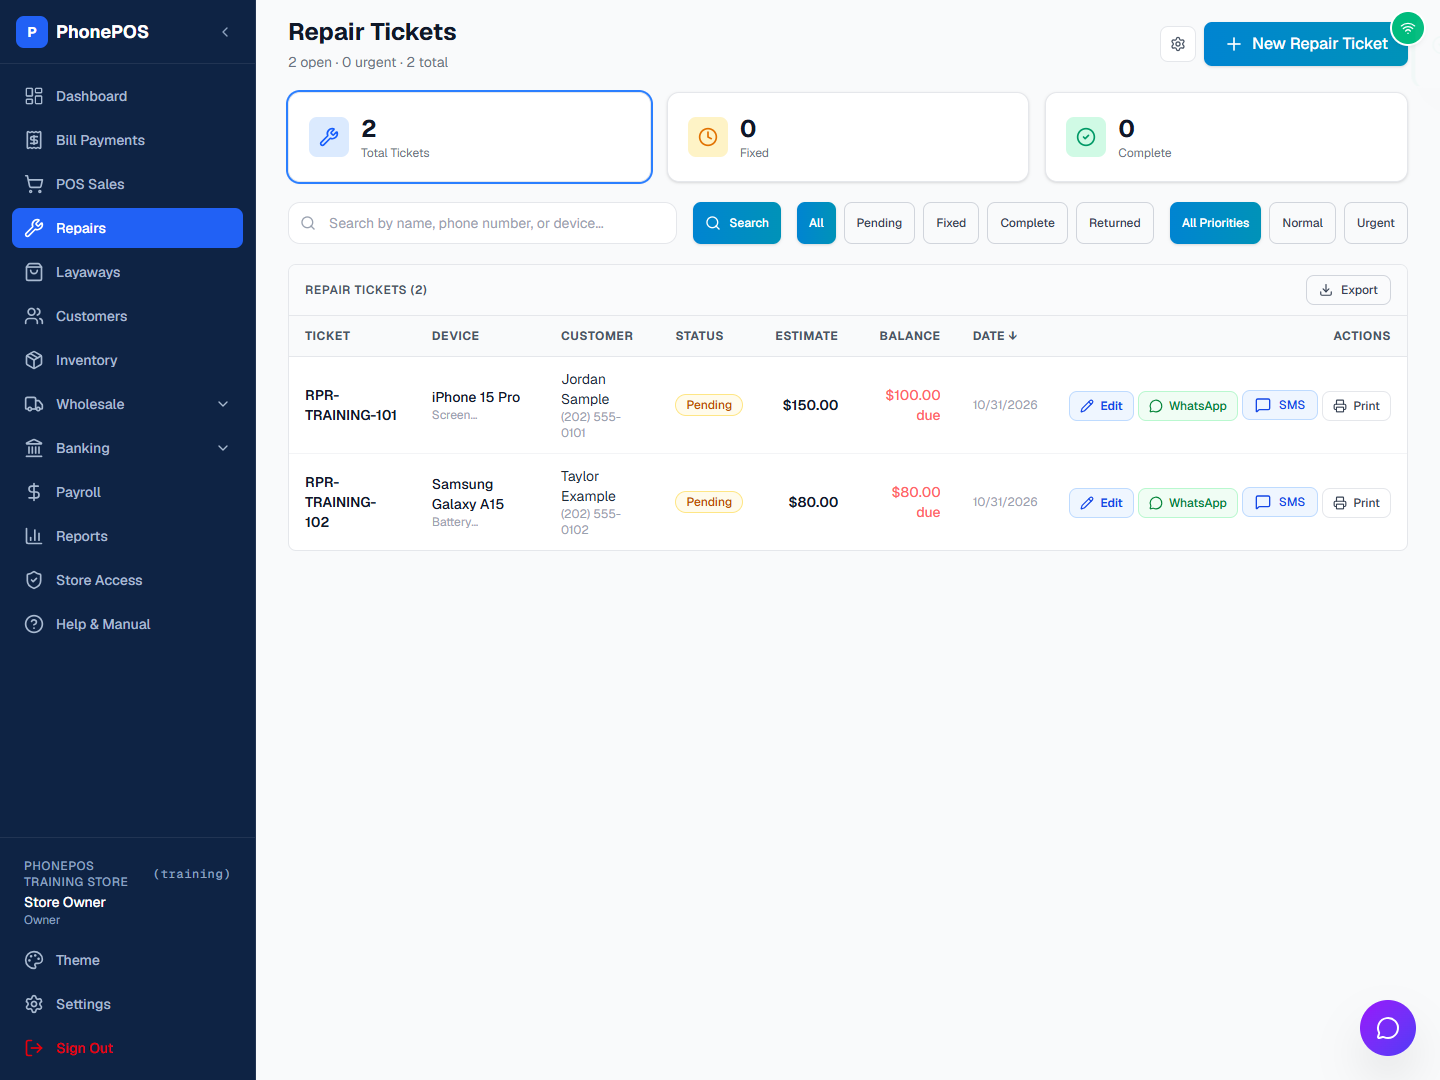
The header shows a summary such as "10 open · 0 urgent · 10 total", with cards for Total Tickets, Fixed, and Complete.
| Column | Meaning |
|---|---|
| Ticket | Ticket number (e.g., RPR-395833) |
| Device | Device model and issue |
| Customer | Customer name and phone |
| Status | Pending, Fixed, Complete, or Returned |
| Estimate | Quoted price |
| Balance | Amount still due (or "Paid") |
| Date | Ticket date |
| Actions | Edit, WhatsApp, SMS when available, and Print |
Use the status filters (All / Pending / Fixed / Complete / Returned) and the priority filters (All Priorities / Normal / Urgent). Repairs, including imported records, appear newest first by date.
How To: Search repair history
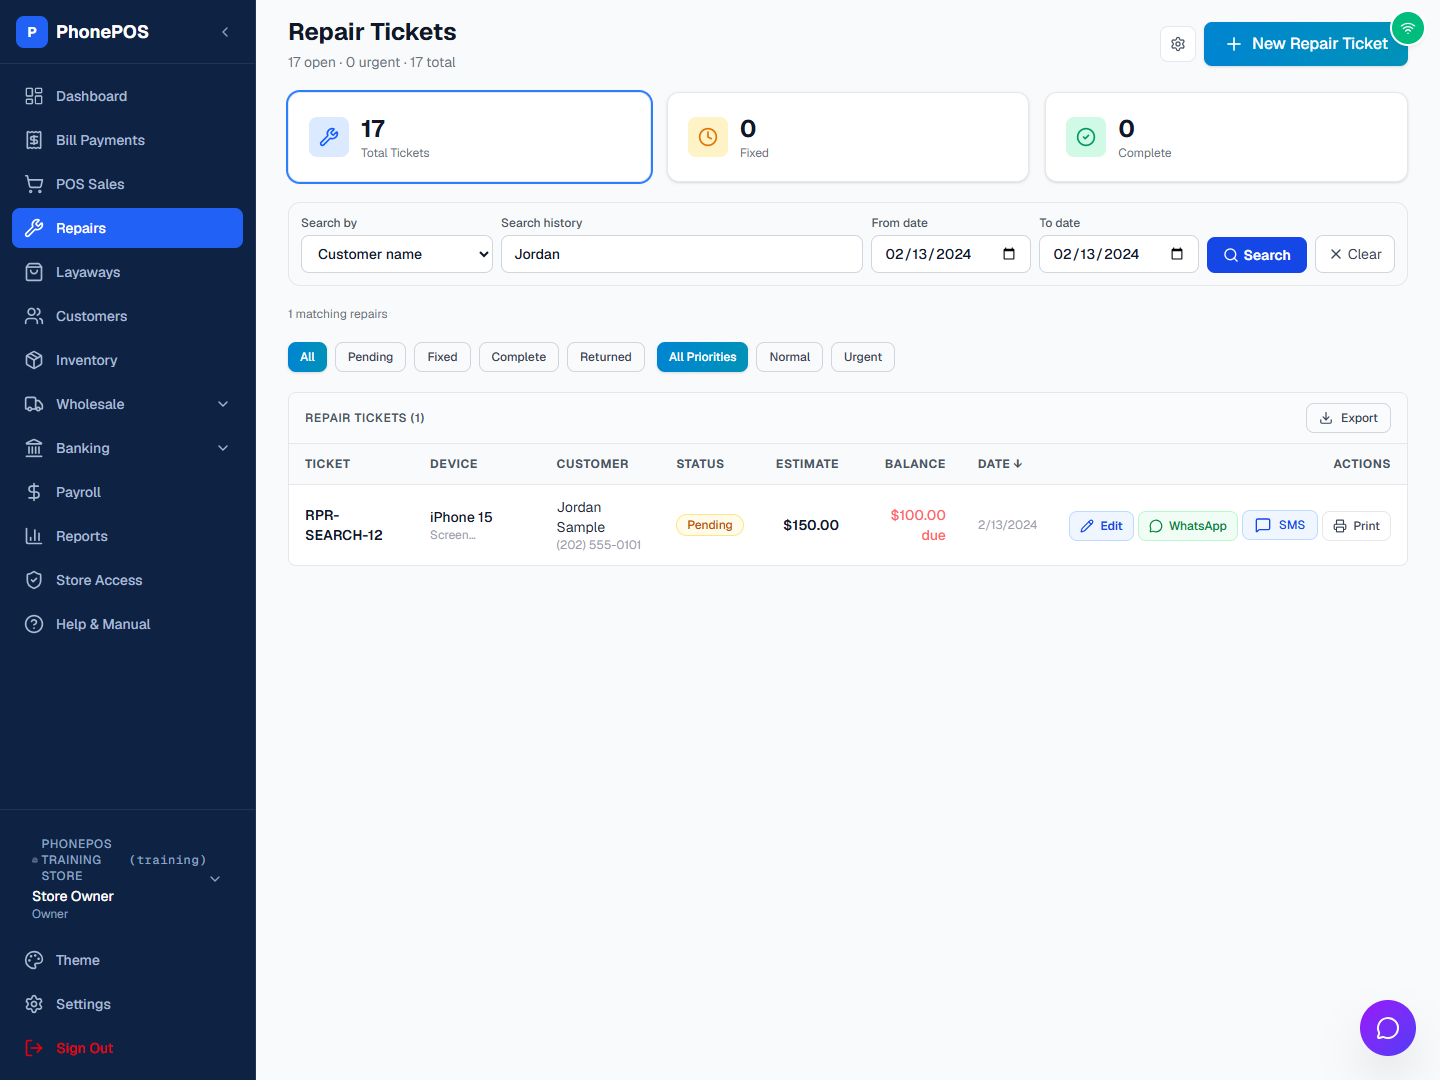
The same custom search is available above Repairs and in Dashboard → History → Repairs. Choose All fields, Customer name, Phone number, Ticket number, Device, IMEI / Serial, Problem, or Technician. Enter the value and optional From/To dates, then click Search or press Enter.
The date range includes both selected days and matches the repair date shown in the table. Status and priority buttons on the main Repairs page work together with the search. A new search starts on page 1. Clear removes the text/date search. The main page's Export and the History tab's Export CSV use the matching records.
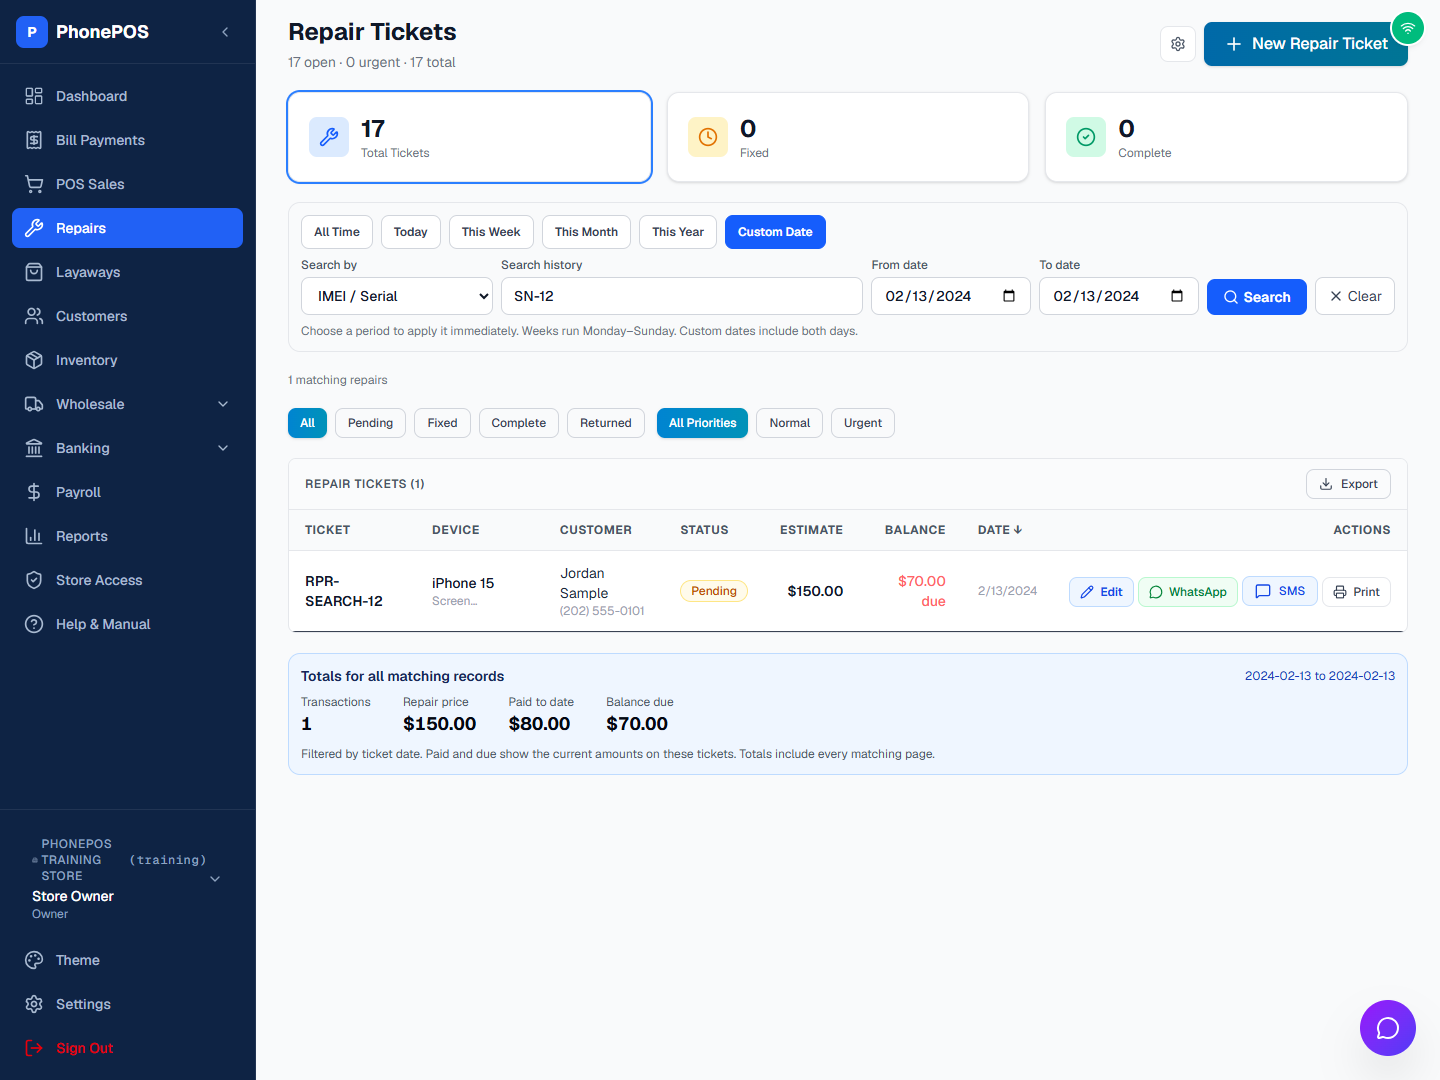
Use the period buttons for Today, This Week, This Month, This Year, or All Time. Use Custom Date and Search for another day or range. The Totals for all matching records panel shows the ticket count, repair price, paid to date, and balance due across every matching page. Native repair payments include the deposit plus subsequent payments once each; imports use their recorded balance. Tickets with incomplete imported amounts are counted but excluded from the money totals, with a notice.
These dates select the ticket date shown in the table. Paid and due are the current amounts on those tickets, not a report of cash collected during that period. Status and priority filters also affect the totals.
Repair Statuses
| Status | Meaning |
|---|---|
| Pending | New repair, not started |
| Fixed | Technician has completed the repair |
| Complete | Completed repair |
| Returned | Device returned without a successful repair |
How To: Create a Repair Ticket
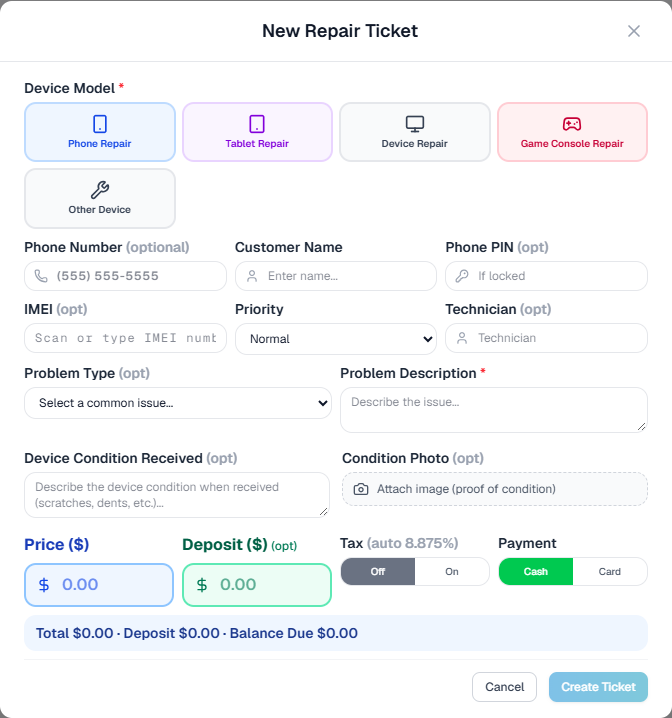
- Click "New Repair Ticket"
- Choose the Device Model type: Phone Repair, Tablet Repair, Device Repair, Game Console Repair, or Other Device
- Fill in the form:
- Phone Number (optional)
- Customer Name (required)
- Phone PIN (optional) — if the device is locked
- IMEI (optional) — scan or type
- Priority: Normal or Urgent
- Technician (optional)
- Problem Type (optional) — pick a common issue
- Problem Description (required)
- Device Condition Received (optional) — note any existing damage
- Condition Photo (optional) — attach proof of condition
- Price ($) — the quoted repair price, and Deposit ($) (opt) — the amount collected now
- Tax: toggle on/off (auto rate)
- Payment: choose Cash or Card
- If your store has active, enabled SMS service, record the customer’s consent using the SMS consent checkbox shown in the form. Only select it after the customer agrees.
- Click "Create Ticket"
The model suggestions include the iPhone 18 models in the store catalog. Check the exact model the customer brought in; the device description can be corrected later with Edit.
What Happens After
- A ticket number is generated (e.g., RPR-395833)
- The ticket appears in the Repairs list
- You can print a receipt for the customer
- You can print a label/sticker for the device
How To: Edit a repair
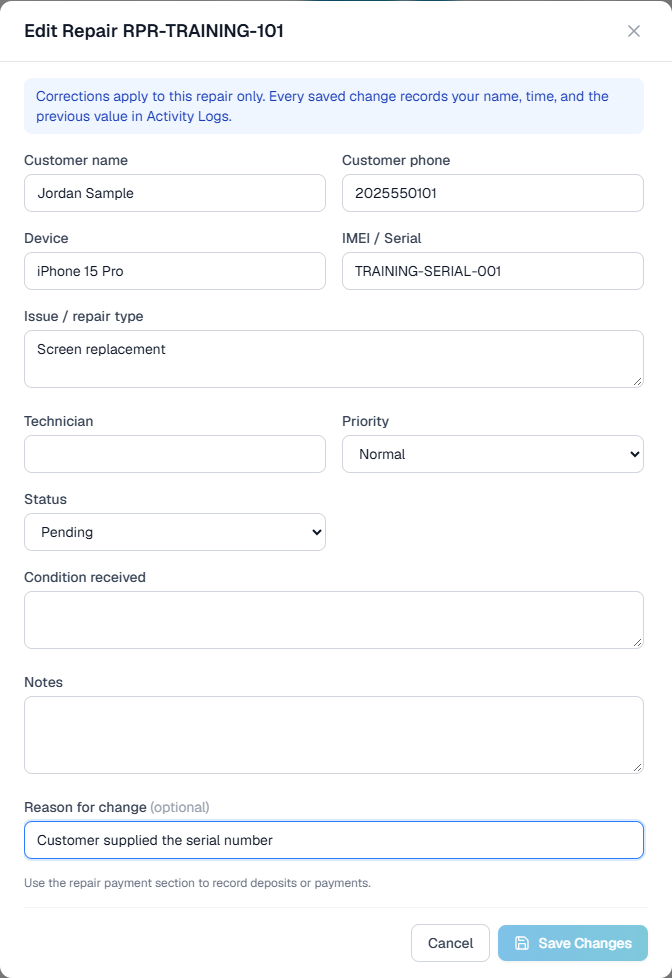
- Find the ticket in Repairs and click Edit.
- Update the customer name or phone, device, IMEI / Serial, issue, technician, or notes. Native PhonePOS tickets also allow status, priority, and received-condition changes.
- Add an optional Reason for change, such as “Customer supplied the serial number.”
- Click Save Changes. Check the success message, then reopen the ticket or its receipt preview to confirm the new information.
These corrections apply to this ticket only. Changing a ticket's customer name or phone does not rename the shared customer record or other repairs. Every saved change appears in Settings → Activity Logs with its previous and new value. Imported tickets preserve their original import data and historical balances; only the fields shown in their editor can be corrected.
If a record changes while you are editing it, use Reload repair and review the current information. Use the repair payment section to record money received; the details editor does not replace the payment ledger.
Repair payments and balance due
The original deposit and subsequent payments appear as separate dated entries. Total Paid includes the deposit plus later payments, and Balance Due reflects the repair total less payments received. After recording a payment, the balance and payment history refresh. Do not enter the original deposit again as a later payment.
A receipt printed for a specific past payment shows the balance at that payment. The current ticket receipt shows the current balance. Use the appropriate receipt when explaining an older payment to a customer.
Repair Receipts & Labels
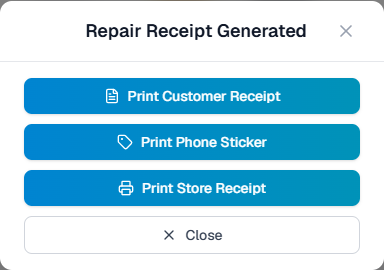
Open the ticket's Print options and choose one output:
- Print Customer Receipt — one customer copy.
- Print Store Receipt — one store copy.
- Print Phone Sticker — the device label.
Customer and store copies print separately. To obtain both, choose each action separately.
Settings → Print & Hardware → Receipt paper defaults to 80 mm receipt-paper printer for payments, repairs, layaways, and sales. Select 58 mm only for a 58 mm roll. In the printer dialog, match the paper width, use 100% scale, and disable browser headers/footers. Reopen the receipt preview after editing a ticket so the newly saved details are loaded.
Tips
- Take photos: Use Condition Photo to document device condition
- Status updates: Keep customers informed — update status as you work
- Deposits: Always collect a deposit for expensive repairs
- Send updates: Use the WhatsApp action on a ticket to message the customer